
Whether you’re an absolute beginner or someone who’s slogged through recipes for years and is ready for something easier, this is for you.
This won’t even be about teaching you how to cook one specific recipe. Instead, I’ll be giving you a simple template to follow that you can use for literally every meal.
(And no, this won’t use a slow cooker/crock-pot as so many “easy cooking” guides do.)
Here are some promises:
- No need for measuring anything
- No need for exact cooking times
- No need for specific ingredients you have to use
- Yes to easy clean-up
- Yes to deliciousness
- Yes to high nutritional value
I know this seems like a long post with a lot of steps. Don’t worry.
The template is basically just this:
- Chop onion, zucchini, and sweet potato.
- Cook them in olive oil.
- Add salt plus 1-2 spices (and maybe some beans), then cook a bit more.
- Push veggies aside and cook egg.
- Flip egg, cook a bit more, then serve.
The whole thing, start to finish (including clean-up) takes just 15 minutes (or even less) once you’ve done it a few times.
The only reason this post is so long is because: (a) I include photos showing every step, and (b) I want to make sure that nothing is ambiguous or confusing—even if you’re completely new to real cooking.
So, I’ll walk you through everything you need to know, including every single piece of equipment you’ll need. My goal is to teach you how to think about cooking so that you don’t need to consult recipes or step-by-step instructions anymore.
But first, I want to explain a big revelation I had about cooking several years ago that made everything feel way easier.
(You can also skip this Myers-Briggs & personal growth type stuff and go straight to the cooking. Throughout this post you’ll see little buttons like the one below—you can tap those to go deeper and get more info, otherwise just read on past them.)
What you’ve probably been taught (or shown) about cooking is wrong. Are you a fellow analytical overthinker? If so, allow me to show you the light.
If you’re a fellow ‘N’ type in the 16 personality types (especially an _N_P), you’re probably drawn to experimenting and trying new things.
You feel bored with rules and traditions.
So, you might imagine that this guide will be all about creating variety in your meals, right?
Nope, I went down that path, and it was way too much work.
For most of my 20’s, I was convinced that being a successful adult meant following recipes to cook fancy, exciting meals.
I would spend hours searching Reddit and Allrecipes for interesting recipes, sorting by highest-rated, and pushing myself to try new flavor profiles.
Especially since I’m an ENTP, I convinced myself that I’d be happier if I constantly pursued novelty—trying new types of cuisine all the time, and a new recipe every night.
But I realized after a while that I was putting so much needless pressure on myself.
Great news: The secret is that you don’t need recipes at all.
I’m writing this post because I know that a lot of you struggle like I did:
Cooking seems hard. But it only seems that way because you’re used to thinking of cooking in terms of following complex recipes.
It doesn’t have to be that way.
You’ve probably also heard how important nutrition is to your mental and physical health. You want to live a long life at peak mental fitness, right?
That’s why we’re going to make it easy for you.
Here’s the thing that takes most _N_P’s (i.e., novelty-oriented overthinkers) a long time to figure out:
When it comes to the world of ideas, philosophy, and learning, we love exploring new things.
But when it comes to the boring logistics of life—like getting our nutritional needs met—we do much better with easy, familiar routines that take up as little of our time as possible.
That’s why the whole idea here is to use this “recipe” as a template that you can follow for literally every single meal.
I still try something new once in a while, but the vast majority of my time I’d rather put my creative energy toward something other than cooking.
Seriously, for years I’ve used this exact technique for almost every single meal.
Intrigued? Let’s get to it.
Let’s assume you have zero cooking gear. This is the list of literally everything you’ll need:
I’ve included links to my specific recommendations for each item.
I’m someone who does a lot of research (and who has personally tried quite a few cooking tools over the years). So everything I recommend is best-in-class (within reason to keep this affordable).
(Note: For products on Amazon, I’ve used affiliate links since I might as well make a tiny amount of money if you buy it. But I promise that I never take incentives from companies. These are all products I already researched and owned on my own.)
Here’s a photo from right before I started cooking. While I will suggest some potential add-ons as well, these are the only things you’ll need to cook every meal:
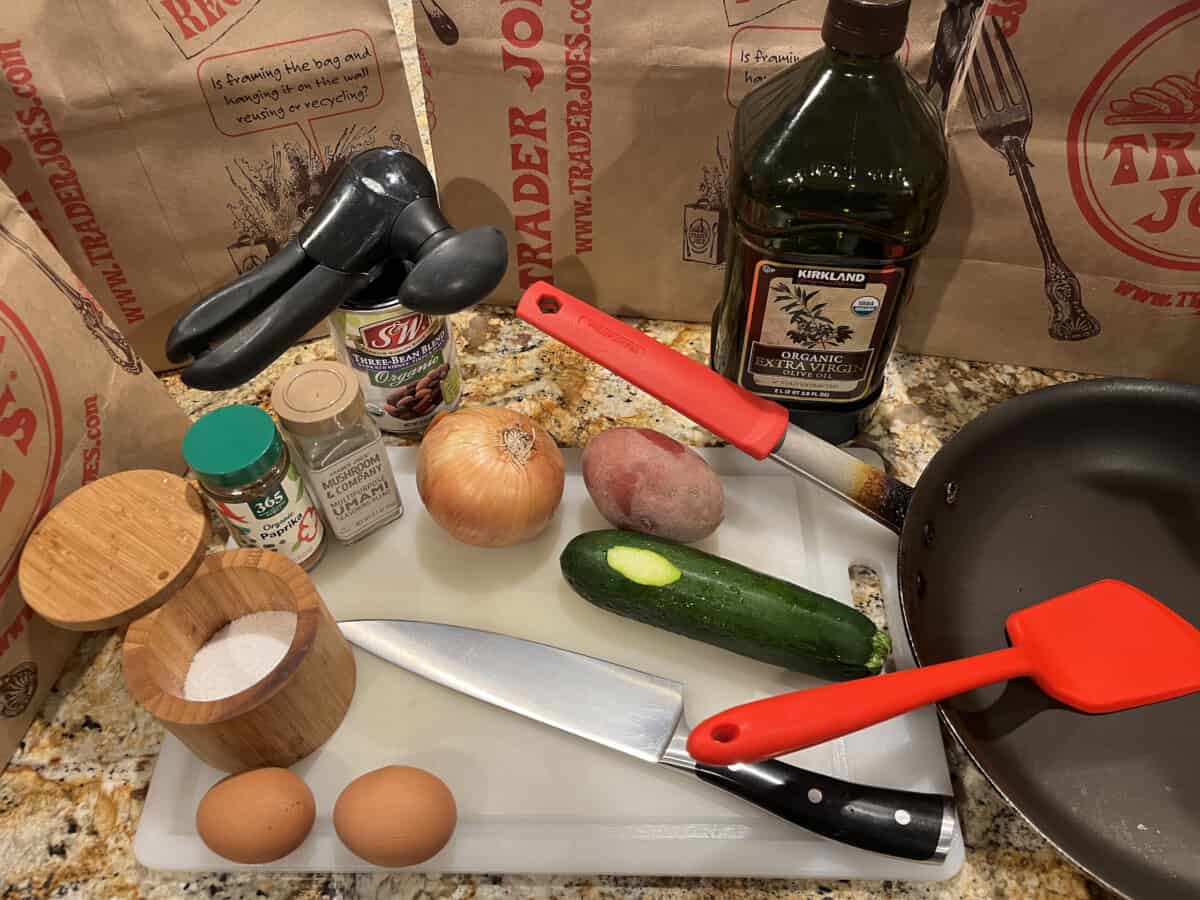
Here’s the full list (P.S. I know you’re used to just skimming lists like this, but remember: This isn’t just a recipe. It’s a template for cooking every meal. So reading this is important):
- 15 minutes of time (longer at first as you’re getting the hang of it)
- A stove (or some kind of heat-producing platform)
- A cutting board
- Make it easy on yourself: Get a dishwasher-safe plastic one with plenty of space.
- A chef’s knife
- In the photos, you’ll see I have a fancier knife now, but I used the linked one for a long time. (If you’re new to cooking, even this one might seem a bit pricey, but you’ll use it for years.)
- Chopping is dramatically easier with a real “chef’s knife” instead of struggling with a small knife.
- By the way, for the vast majority of your cooking needs, don’t use a serrated knife (i.e., the saw-type edge).
- P.S. Never put your chef’s knife in the dishwasher.
- A nonstick pan
- Nonstick pans are ideal for most easy cooking situations.
- And yes, there are cheaper pan options available, but the linked one doesn’t have unhealthy chemicals.
- P.S. Never put this in the dishwasher. And ideally, wait till it cools before hand-washing it. Yeah, I know that sounds annoying, but I promise that it’ll take less than 30 seconds once you get the hang of it.
- A spatula / stir spoon
- I’ve tried a lot of these, and this is my favorite for using on nonstick pans. To preserve the life of your nonstick pan, only use silicone instruments on it (never metal).
- Olive oil
- Ideally organic extra virgin.
- By the way, if you live in the US, don’t bother with imported (just get California-grown if it’s cheaper).
- Salt
- The ideal type of salt to use is a more controversial topic than you might think. Get Diamond Crystal Kosher salt (it’s more expensive than it should be on Amazon, so get it at a local store if possible).
- Pepper or paprika, plus one or two common spice blends (you can start with just cumin if you want to keep it simple)
- You need way fewer spices than you might think. Definitely not a whole drawer of them. For most of my meals, I only use one or two spice mixes (a spice mix is just a regular cylindrical container of dried spice that contains several different spices together).
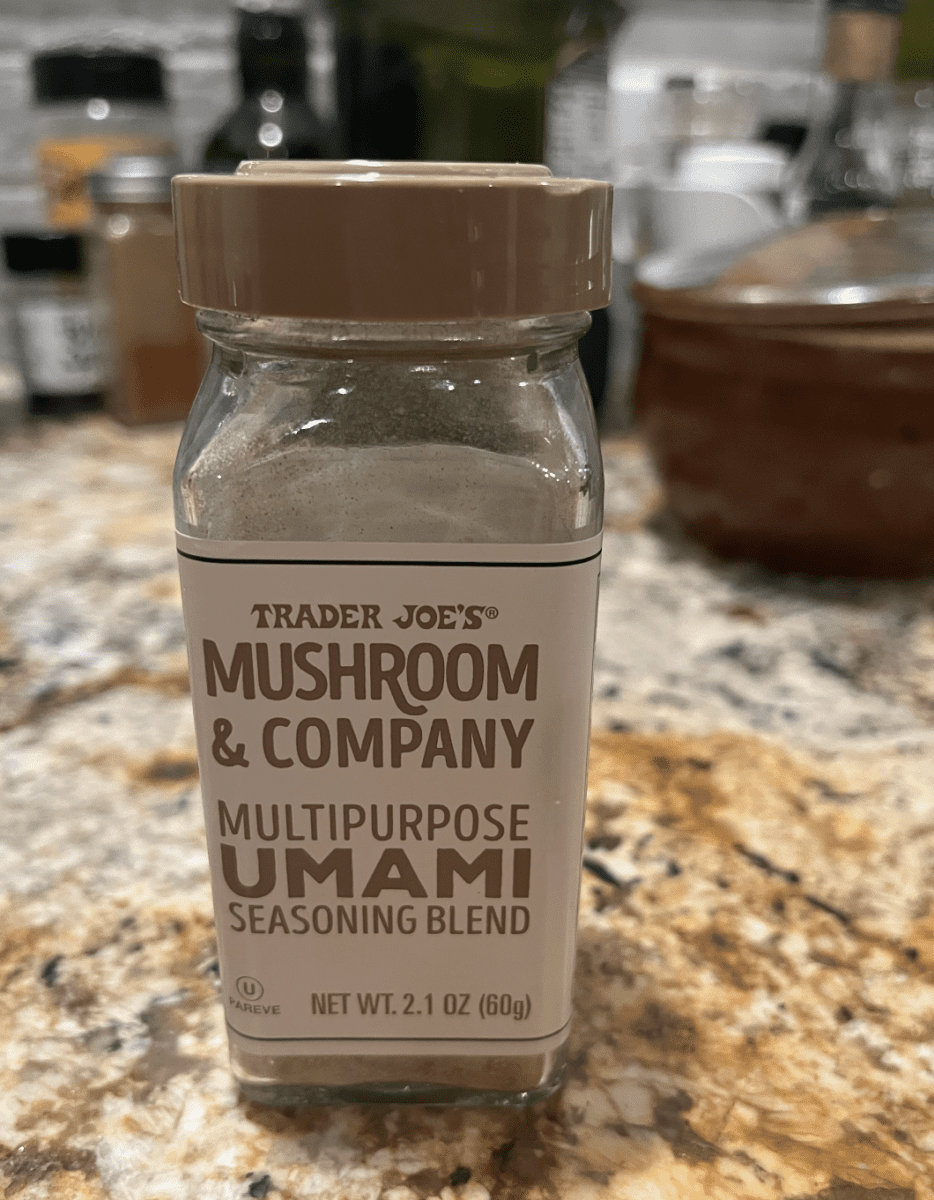
- “Multipurpose Umami Seasoning Blend” from Trader Joe’s (or “Organic Umami Seasoning” from Whole Foods) is my go-to spice blend. Otherwise, “Tandoori Masala” type blends tend to work really well. Or, you can just use cumin.
- I’ll also get into spices more in Part 2 when I explain how to add more variety to your meals.
- One more thing to know here: Spices lose their potency after a few years. So if you haven’t cooked in a long time, you might want to buy some new ones.
- 1-2 eggs
- For animal welfare, I try my best to buy organic pasture-raised eggs. FYI, most people don’t know this, but the various terms you see on eggs mean very specific things:
- Cage-free is better than nothing, but it generally means the chickens are still crammed in terrible, packed barns—just not in even worse cages 🐥😭
- Free-range is better than cage-free, but they still typically only get 2 square feet of space and infrequent outdoor access 🐥😥
- Pasture-raised means they get 108 square feet of space, spend a lot of time outdoors, and get to eat their natural diet of grass, bugs, and worms 🐥😍
- So, the latter makes for healthier chickens with more omega-3’s for you and far less horrible conditions for them. Those eggs are also more expensive, so I empathize if it doesn’t fit in your budget.
- A few common vegetables
- The most important core 3 are: onion, sweet potato, zucchini.
- Organic is less important for onions, but try to get organic for the other two if you can afford it.
- There are several major types of onions. Yellow is the one I most commonly use, but honestly I haven’t found a dramatic difference between all of them.
- Same with sweet potato. There are orange ones, white ones, and purple ones. Any of them are fine, and I tend to just rotate them for variety.
- Other vegetables I commonly add (not all at once, but a few at a time):
- Red pepper
- Other varieties of sweet potato (e.g., purple)
- Cremini mushrooms
- Yellow or other regular potatoes
- Broccoli or broccolini
- Carrots
- Brussels sprouts
- Bag of pre-washed baby spinach
- Bag of pre-washed and shredded kale
- (P.S. If you think you hate broccoli, spinach, or brussels sprouts, it’s probably because you had badly-cooked or out-of-season versions. All three of those veggies are super tasty when cooked properly, i.e., not overcooked.)
- The most important core 3 are: onion, sweet potato, zucchini.
- A can of beans (and can opener)
- I like getting three-bean combination cans at Costco (pinto, black, kidney), but pretty much any bean is fine: garbanzo, cannellini, etc. (as long as it has no weird additives or sauce—it should just be plain bean).
- Even better, rotate in different bean types for variety!
- What about meat? I’ll cover this in part 2, but I promise that this will be super tasty and nutritious even without it.
Yes, that’s literally all you need to cook every meal using my template. One single pan and a few simple ingredients.
Here’s what to expect:
Most recipe websites will give you an estimated cooking time, but they won’t include the time for prep beforehand and cleaning afterward.
With this template, I aim for 15-20 minutes or less from start to finish:
From taking the ingredients out of the fridge to having everything either washed or in the dishwasher.
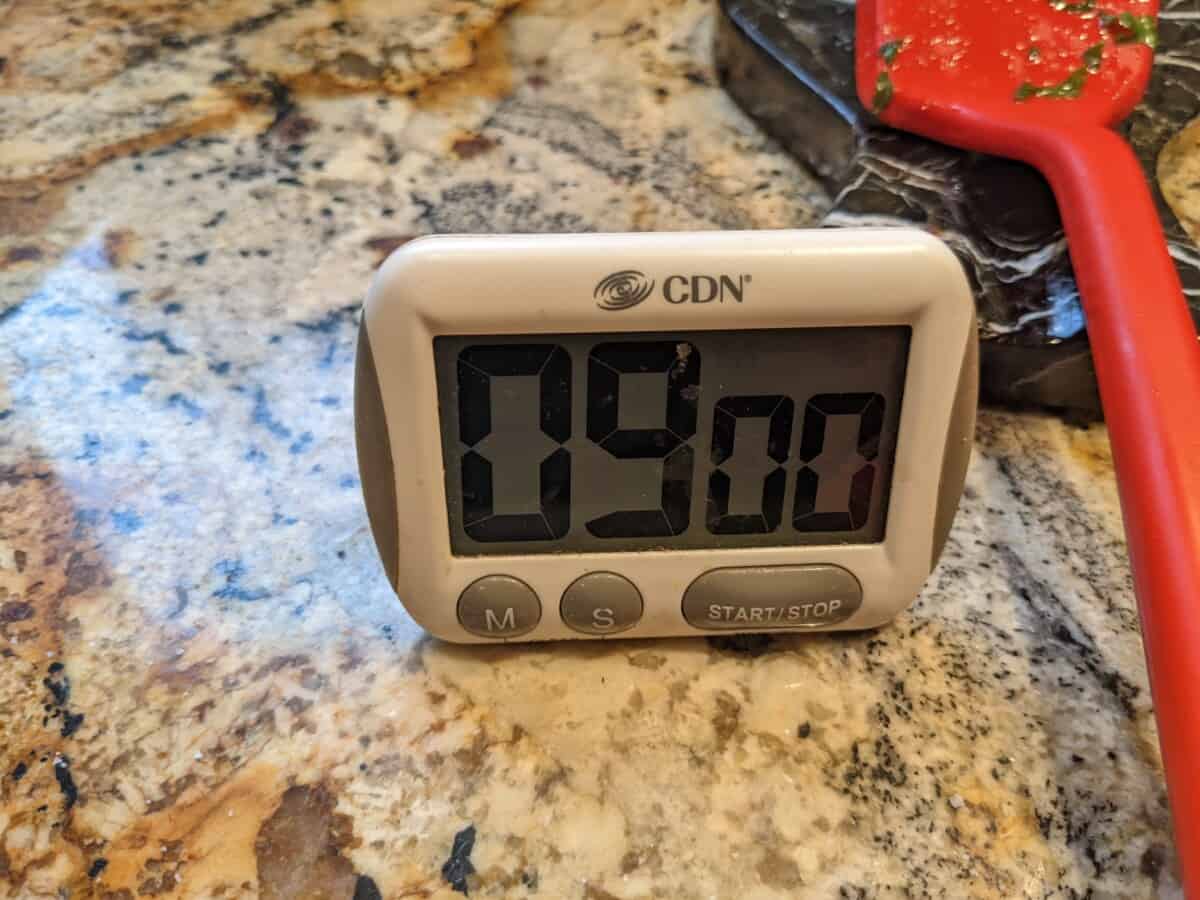
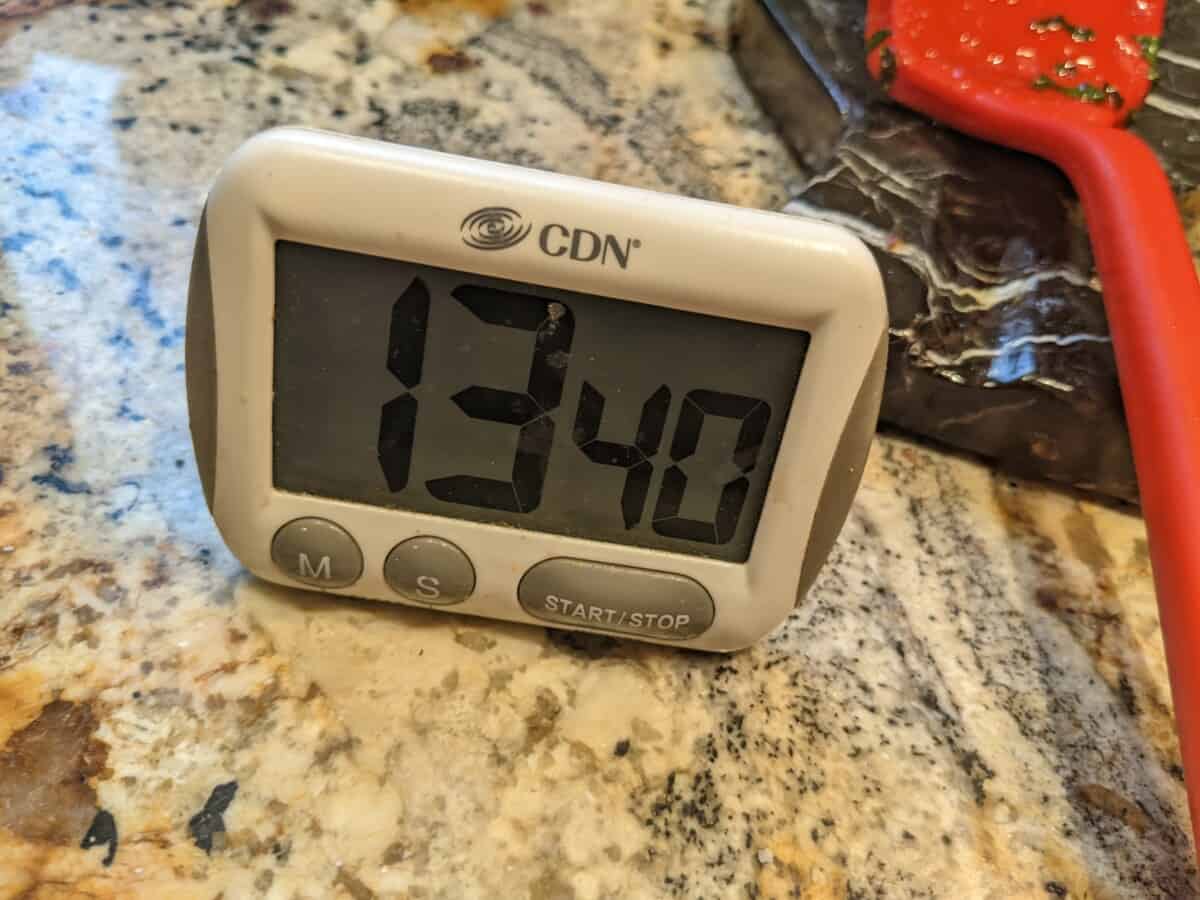
To prove how quickly it’s possible to cook this meal, I set up a timer and took photos along the way, which you’ll see throughout the rest of this article.
I even tried to go through all this at a slower pace than usual to simulate what it would be like for more of a beginner.
(Plus, I was pausing a lot to take pictures for this article, so you can safely subtract a minute or two from most of the timer readings you’ll see.)
Even faster is possible too. When I’m in a big hurry, I can do it in 10 minutes if necessary.
All you have to do is turn up the heat.
But there’s a cost: It’ll turn out a little less tasty, and you’ll have to be more vigilant to stir frequently so things don’t burn.
How much will this make?
Enough for two light-eaters like my partner and me or one person who eats less like birds and more like a typical human 😅.
But remember: I promised no measuring, so if you want more or less, simply add more or less of everything along the way. No need for precision here.
In the rest of this article, I’ll be demoing the “breakfast/brunch version” of the template (and at the bottom I’ll explain a bit about lunch/dinner as well)
(Really, the only thing that makes it the breakfast version is it’s a little lighter and has egg in it 😆🥚🍳).
I’ll explain in Part 2 how to modify the base template for other meals (spoiler alert: it’s not very different at all).
Let’s get cooking: step-by-step
Step 1: Wash your vegetables
For the basic meal template, I most often just use zucchini, onion, and sweet potato. No need to wash the onion, so we’re working on the zucchini and sweet potato here.
Simplest version: Just put them under the faucet to rinse off any obvious gunk.
Better version: I keep a spray bottle by my sink that’s a mix of 1 part cheap white vinegar to 3 parts water. I spray the vegetable, give it a quick scrub with my hand, then rinse under the faucet. If it has some less-appetizing-looking areas, I might give it a firmer scrub with my vegetable scrub brush.
(Honestly though, my partner often skips washing the vegetables entirely, and we haven’t died yet 😅)
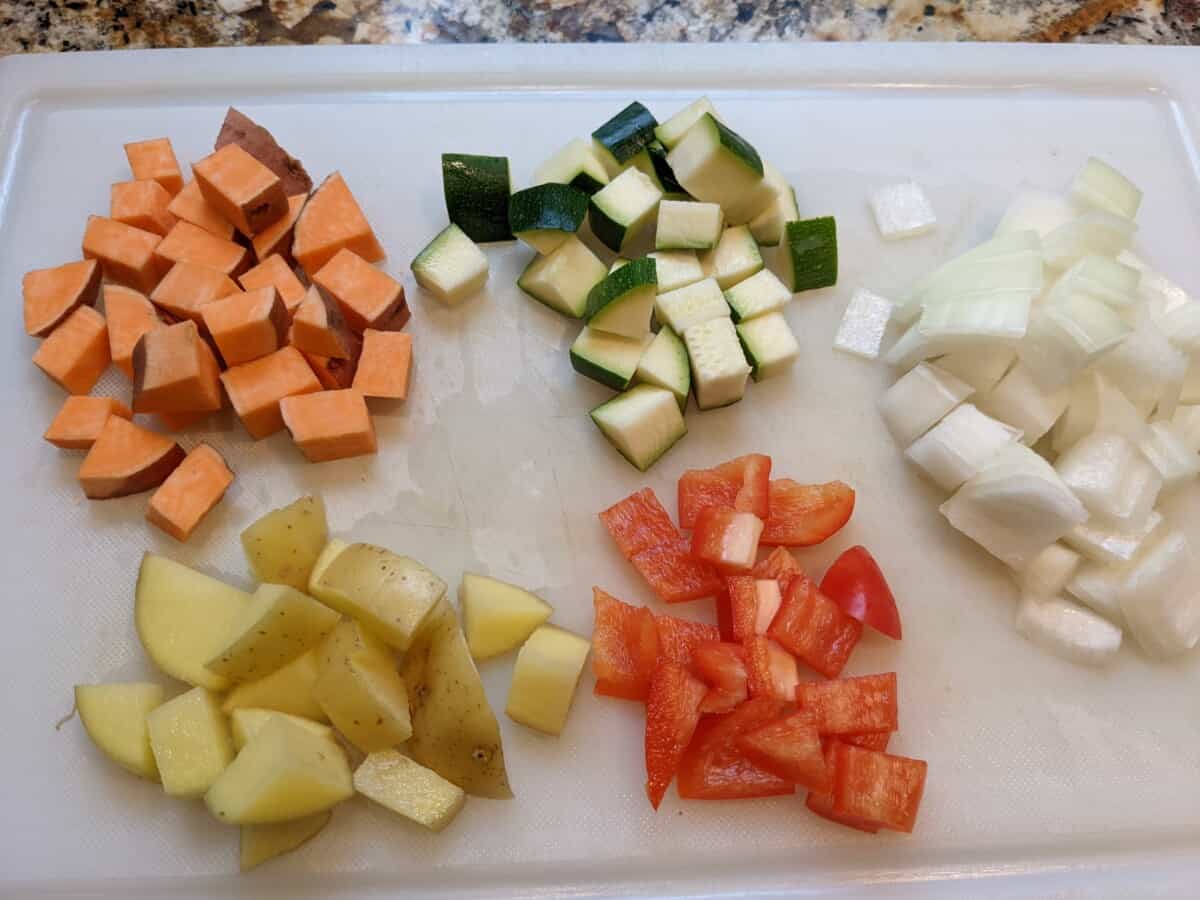
Step 2: Chop them
Here’s what you want to end up with:
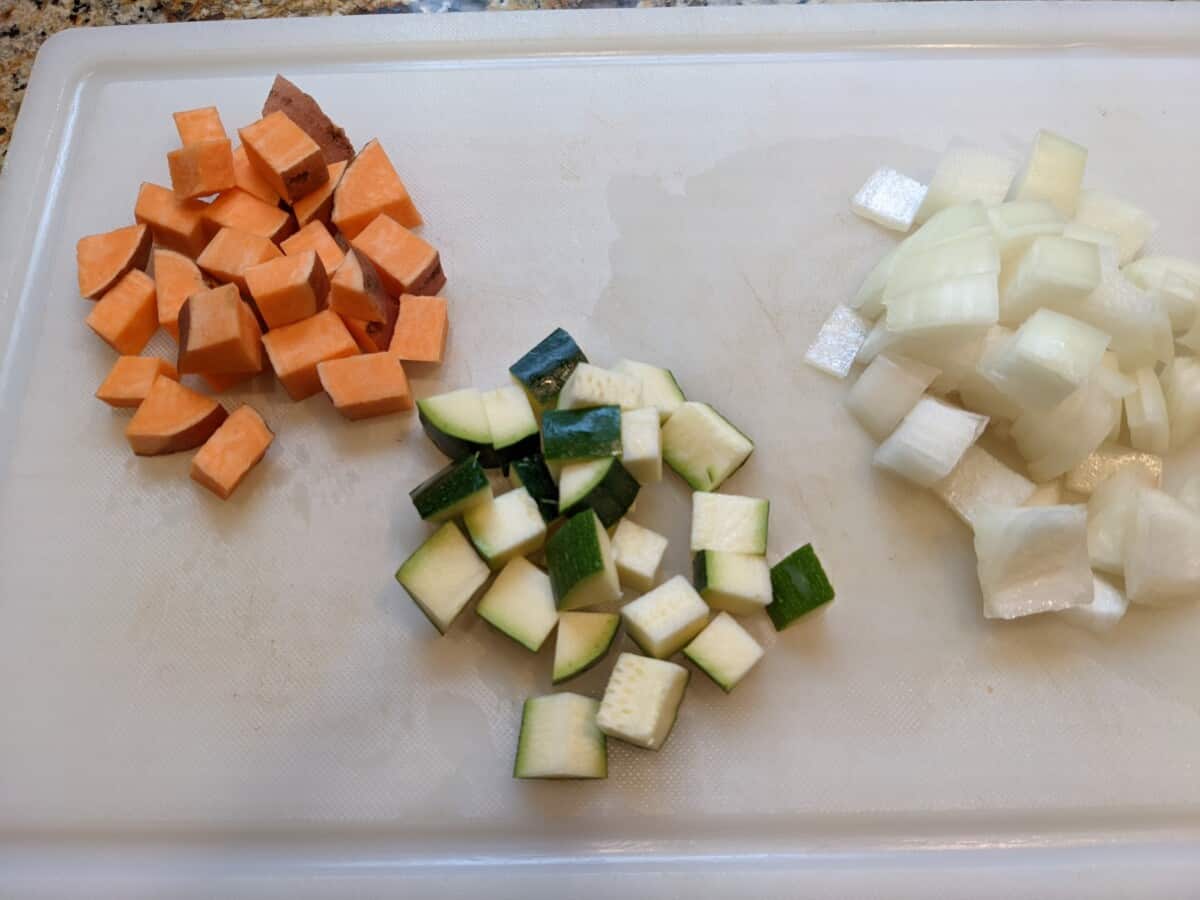
If it’s super clear to you already how to make that happen, read on. Otherwise, tap the button below for step-by-step instructions, starting with basic knife skills.
Don’t worry: This is easier than you might think.
But it’s important to have a good cutting board and a sharp knife.
It’s counter-intuitive, but if you have a crappy dull knife, you’ll naturally press harder and you’ll be more likely to hurt yourself (plus, it’ll be a lot more physical labor to chop).
So, if you’re going to invest money anywhere, a good knife makes sense. Otherwise, even if you have a cheap one, you can get it professionally sharpened every few months for not too much money (try your local farmer’s market). Or, you can buy a super easy sharpener to use yourself.
By the way, do not get one of these fancy “automatic” chopper devices:
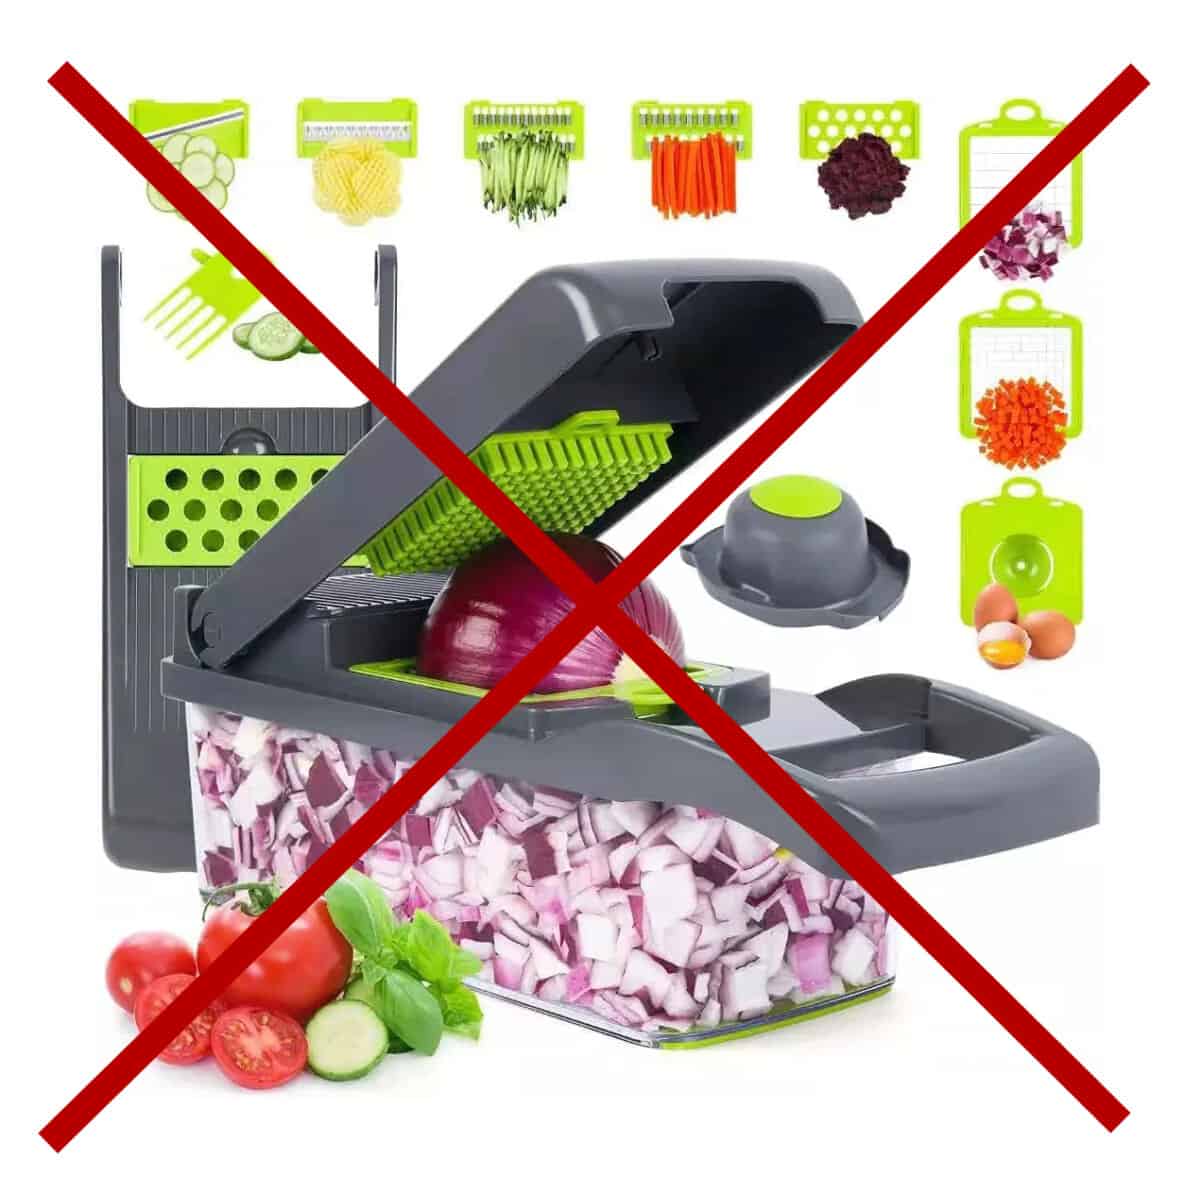
I’ve tried a few of them, and they end up being more work since they’re annoying to clean.
Trust me: It’s much easier to use a knife and cutting board.
How to chop:
If you have no idea how to use a chef’s knife (e.g., making a claw grip with your fingers so you don’t accidentally chop them off), watch the first few minutes of this video:
But don’t worry about the fancy “dicing into super small bits” part. Larger chunks will be fine.
Most importantly, just remember:
- Curl your fingers so you don’t cut them.
- Hold the knife with part of your grip on the metal and part on the handle.
- (For any knife other than an Asian one…) Make a kind of rocking wheel motion as you chop (as you can see at the 1:30 mark of the video). It should feel more like a very gentle pushing forward rather than slamming up and down onto the cutting board.
Now, here’s how to chop each of my three core vegetables:
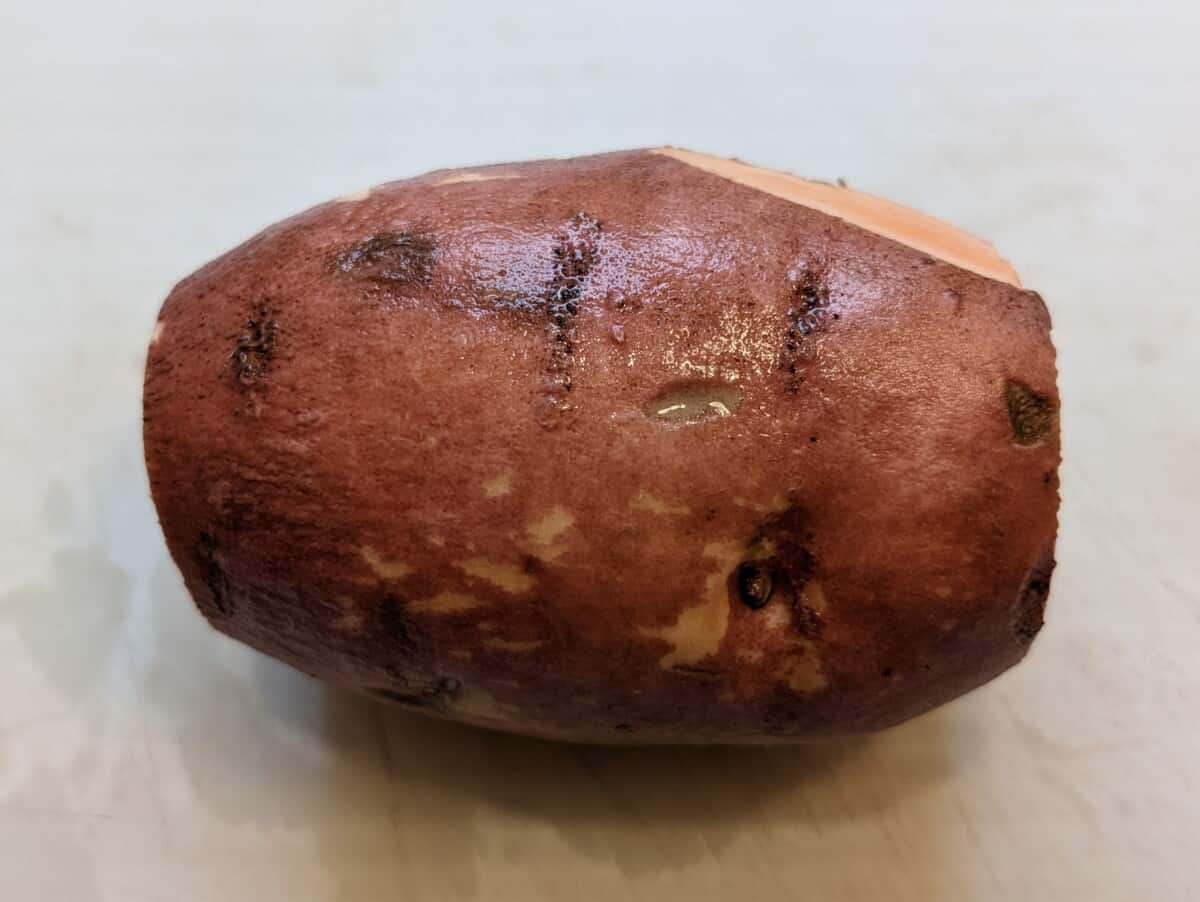
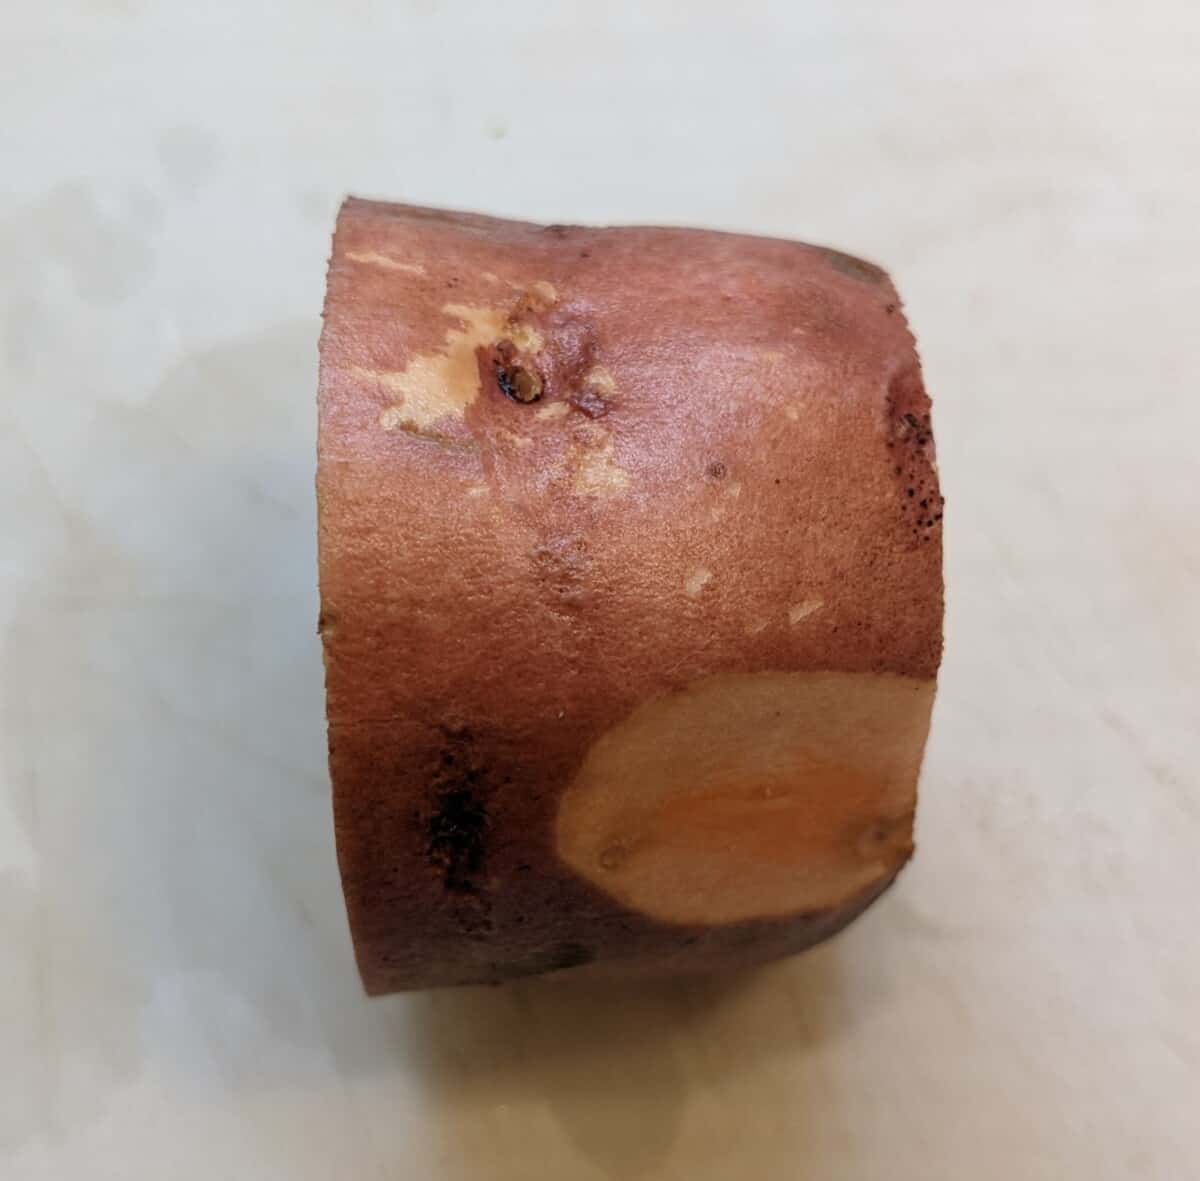
Sweet Potato:
First, chop off a chunk like this (maybe half or a third, depending on how big the potato is—exact measurements don’t matter):
Slice it a few times:
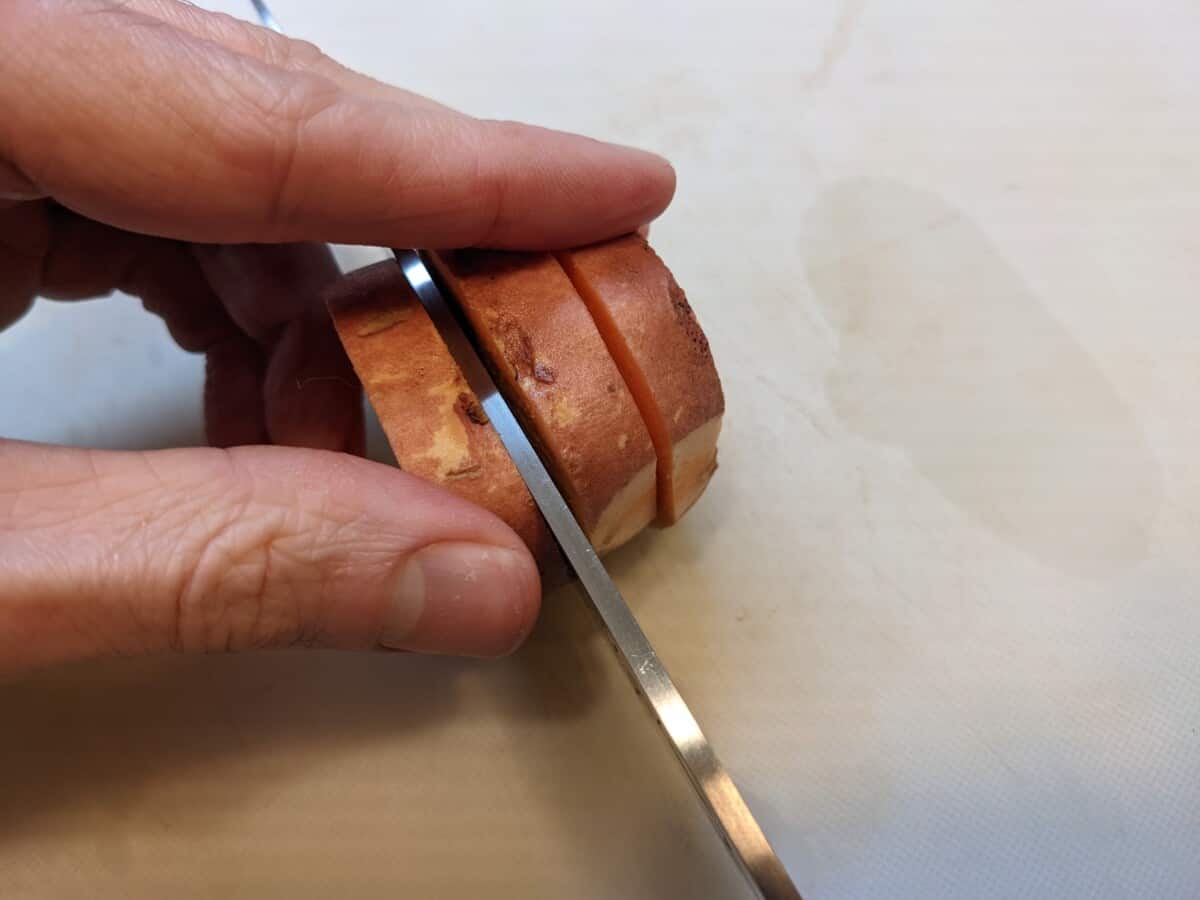
Rotate, and slice again:

Then rotate one more time and slice into cubes:
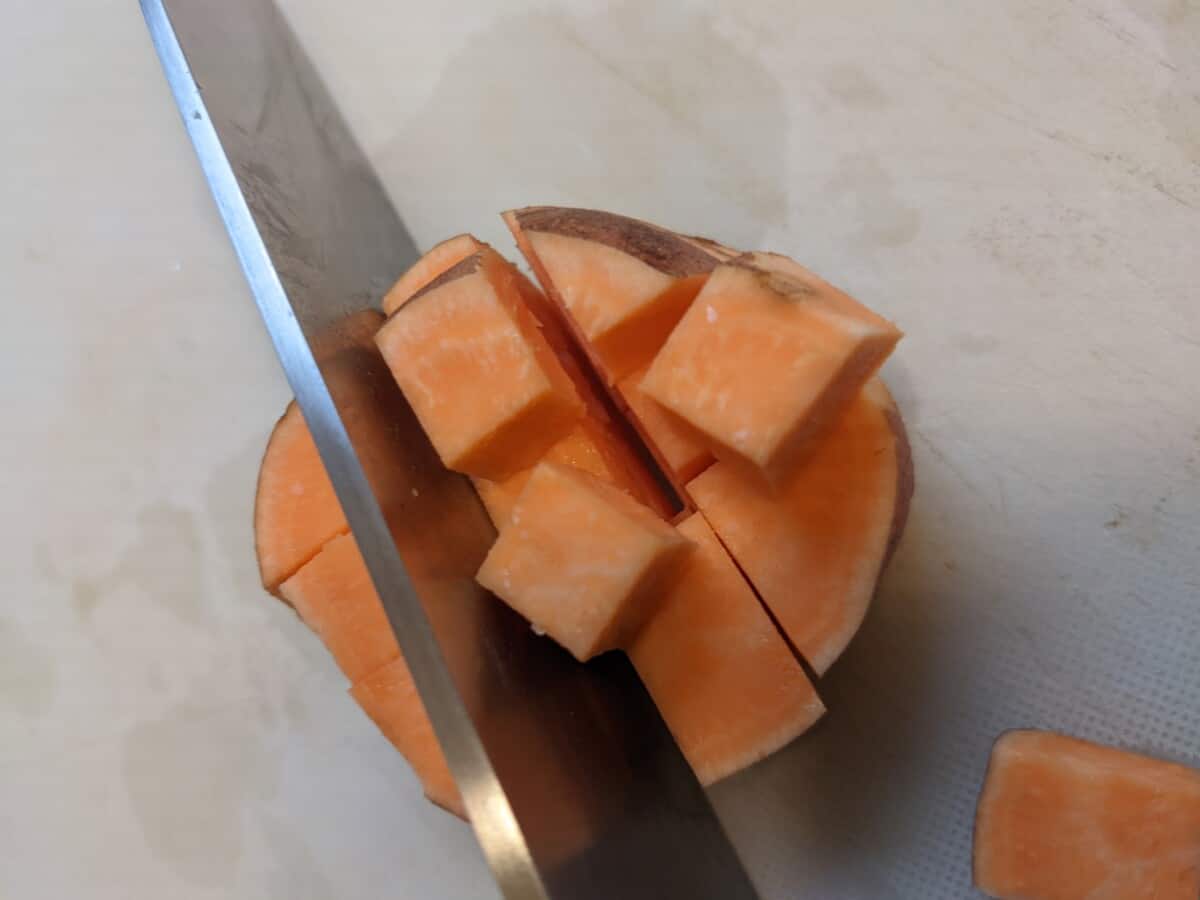
Still feel too hard?
Forget the cubes and just make them long rectangles.
No big deal!
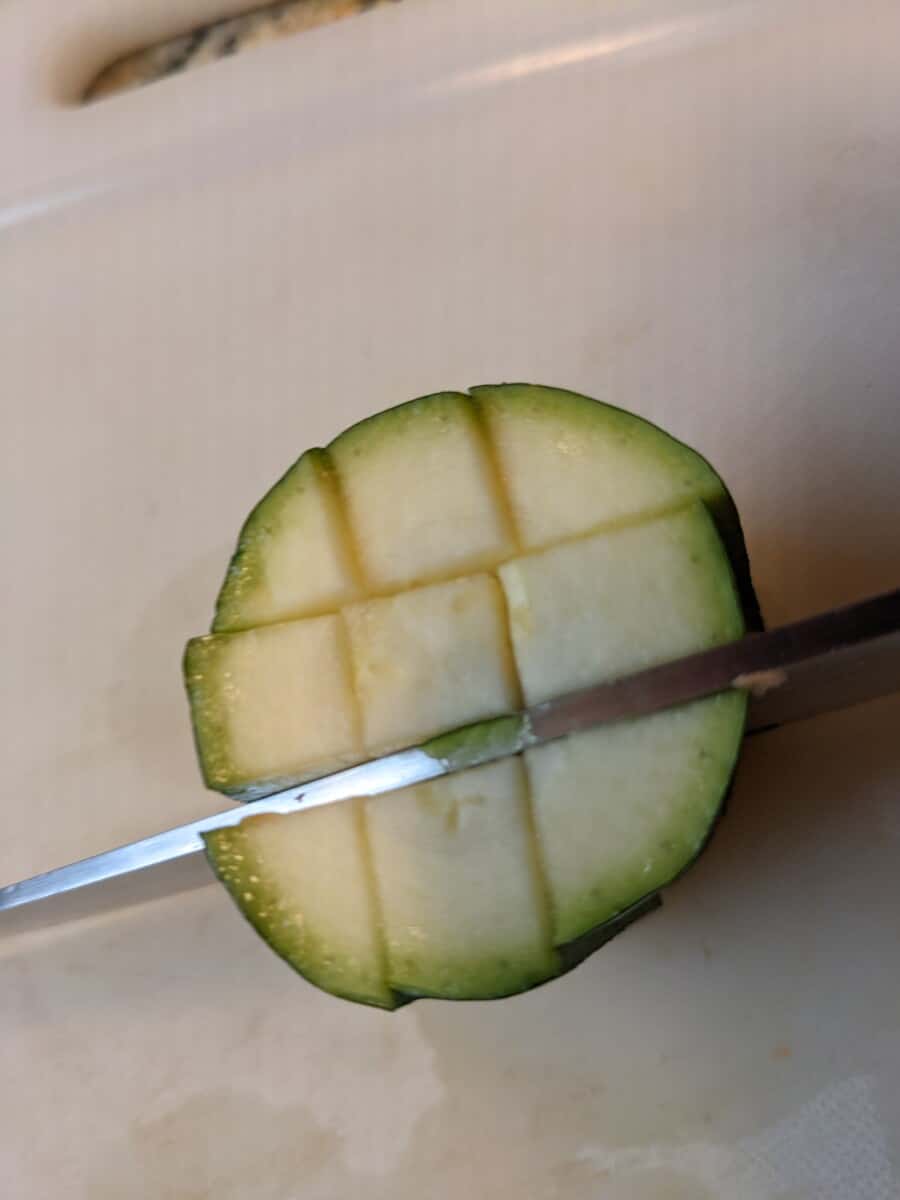
Zucchini:
Same thing. Chop off a chunk, then slice a few times:
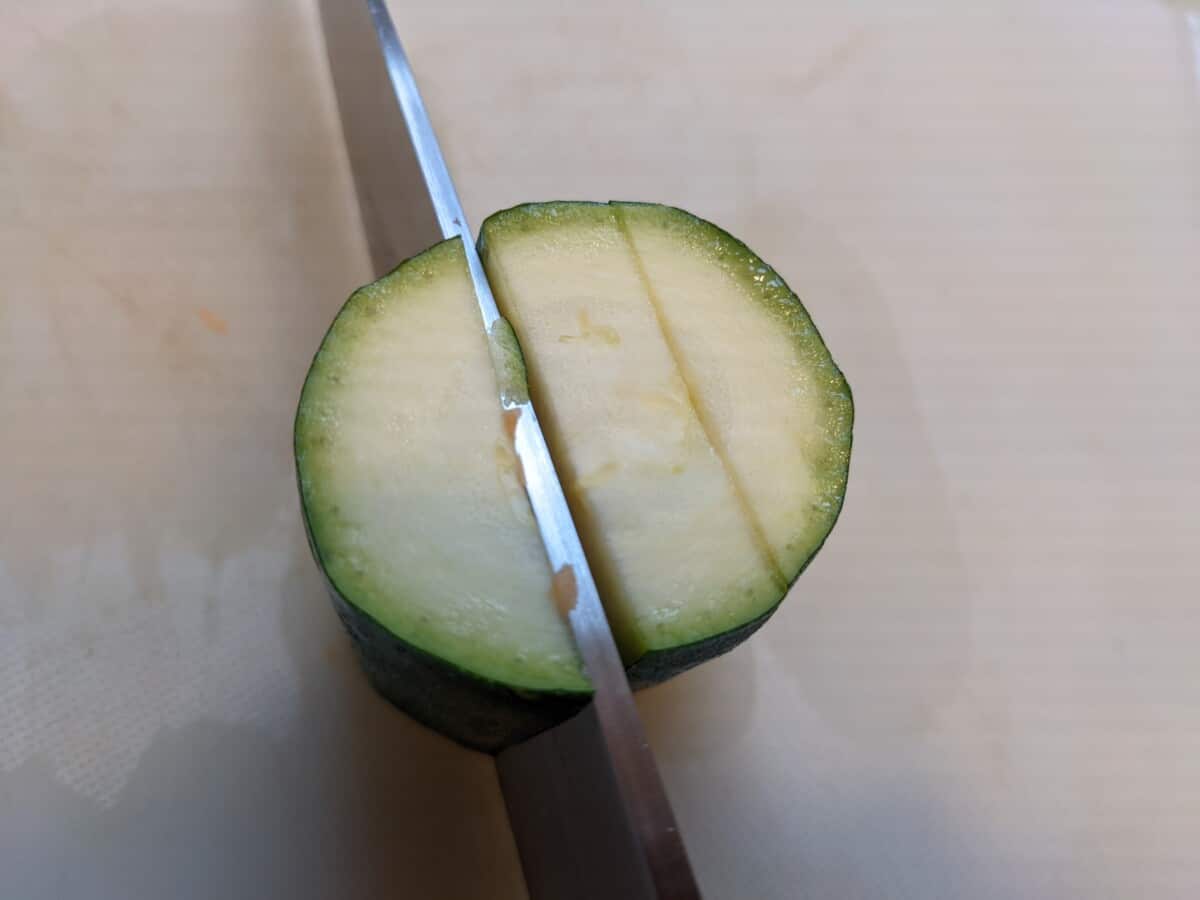
Rotate, slice again, then chop into cubes:
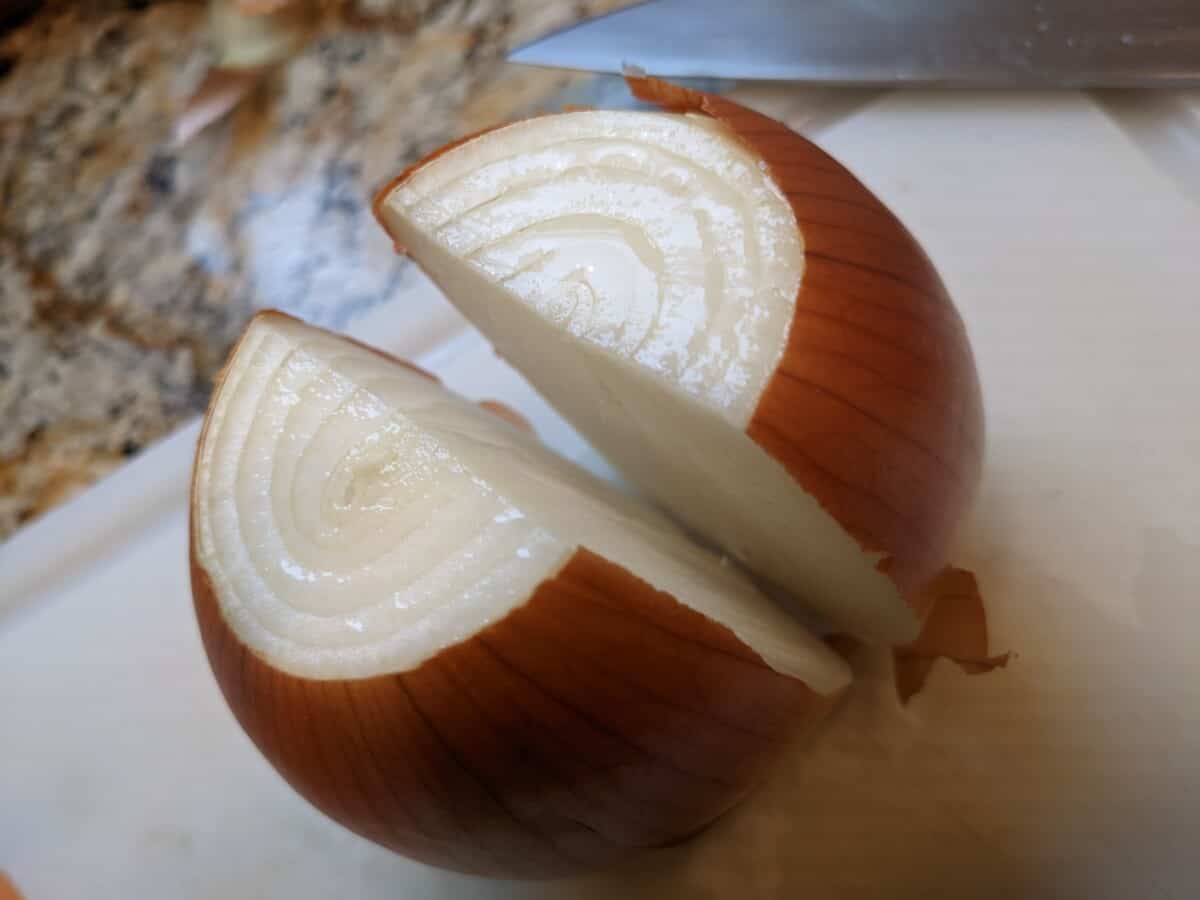
Onion:
First, chop off the two ends, then slice the onion in half:
Next, it depends on whether or not you’re ok being a little wasteful.
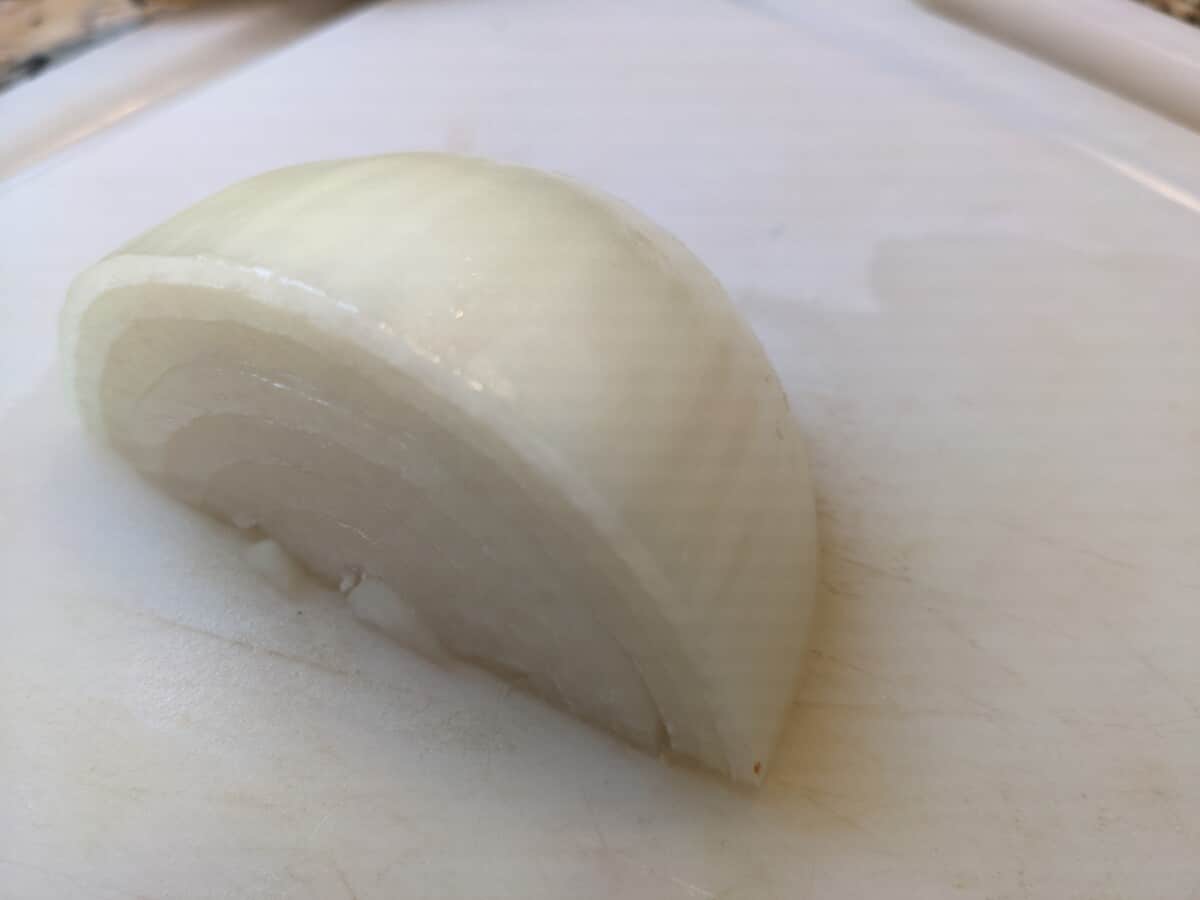
If you want to preserve as much of the onion as possible, carefully peel away the skin (just the outermost brownish layer).
I, however, am willing to be a little wasteful in exchange for convenience. It’s much easier to just pull off the outer white layer of onion and take the skin with it:
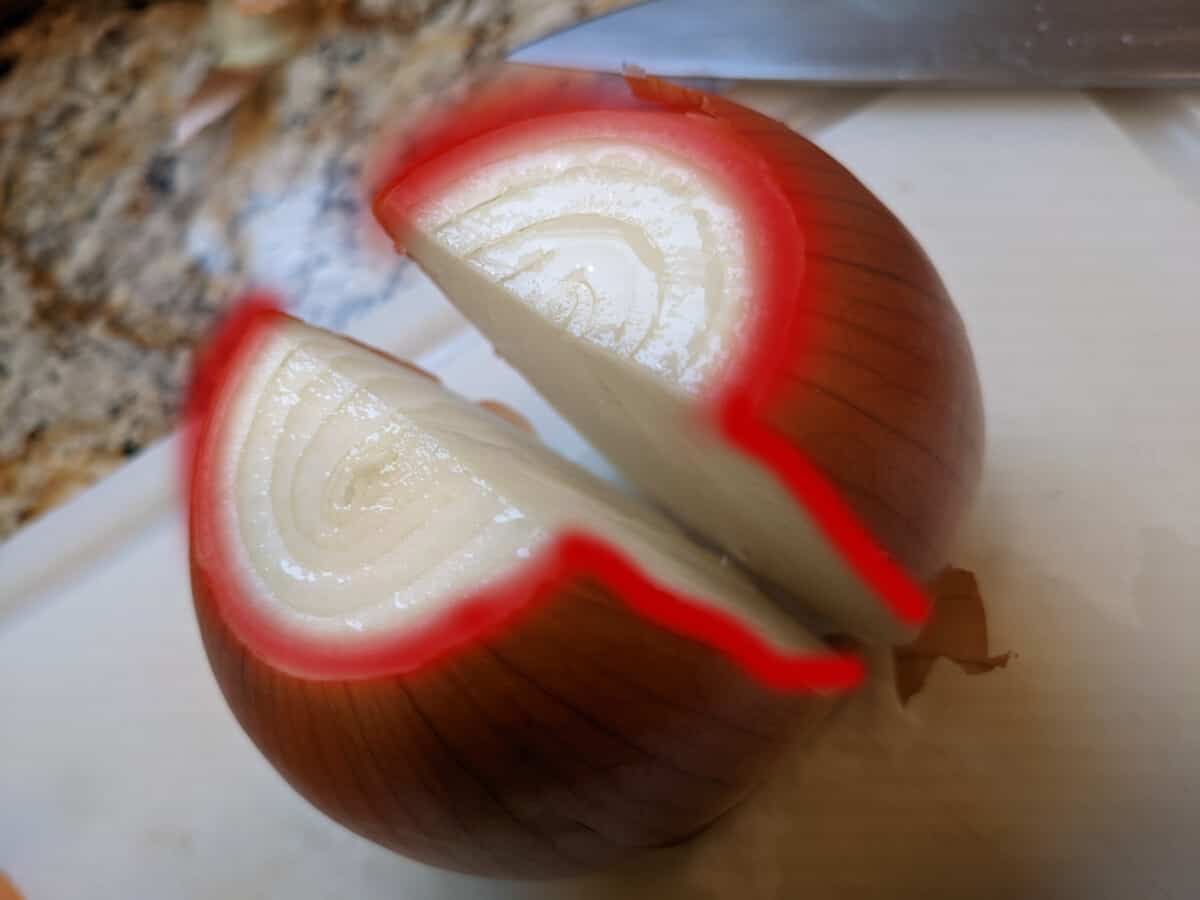
Sorry, onion.
With the skin off, it should look like this:
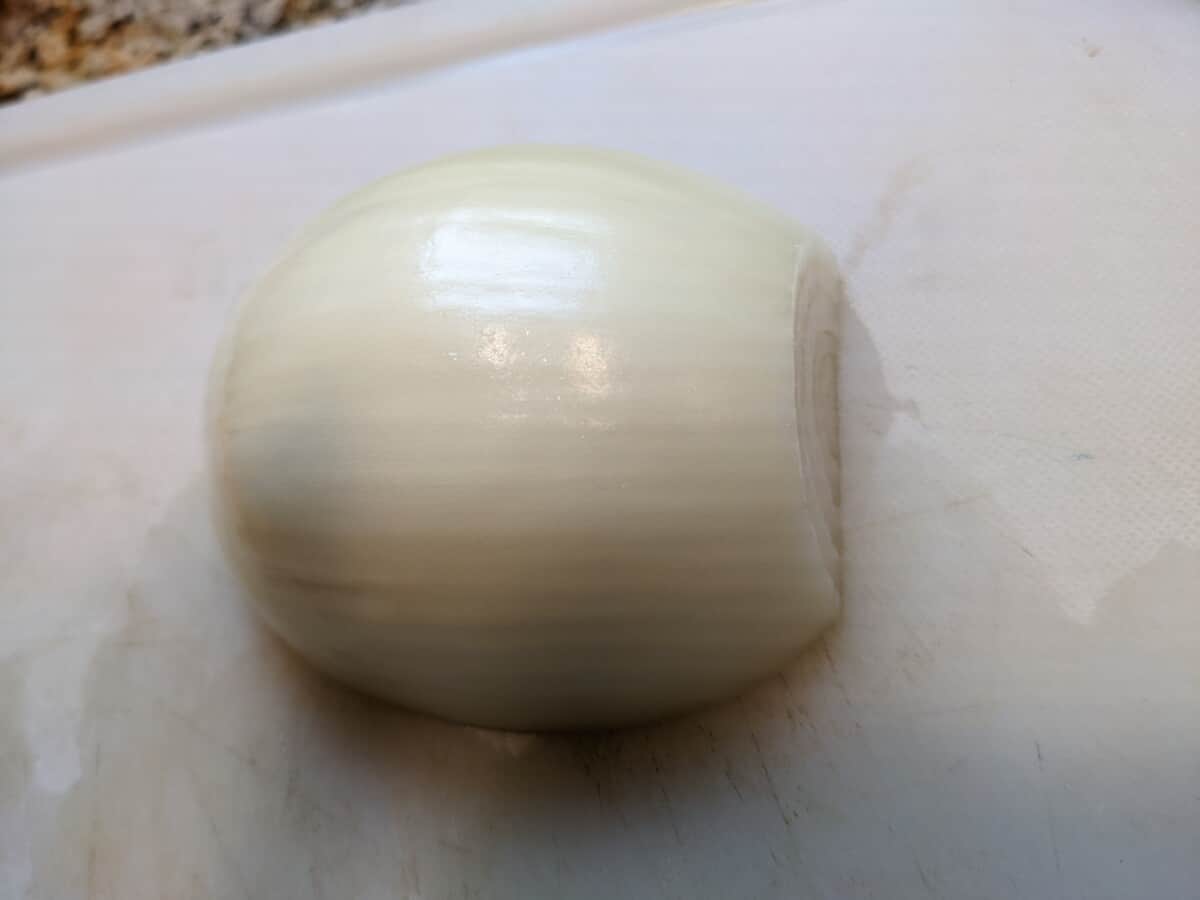
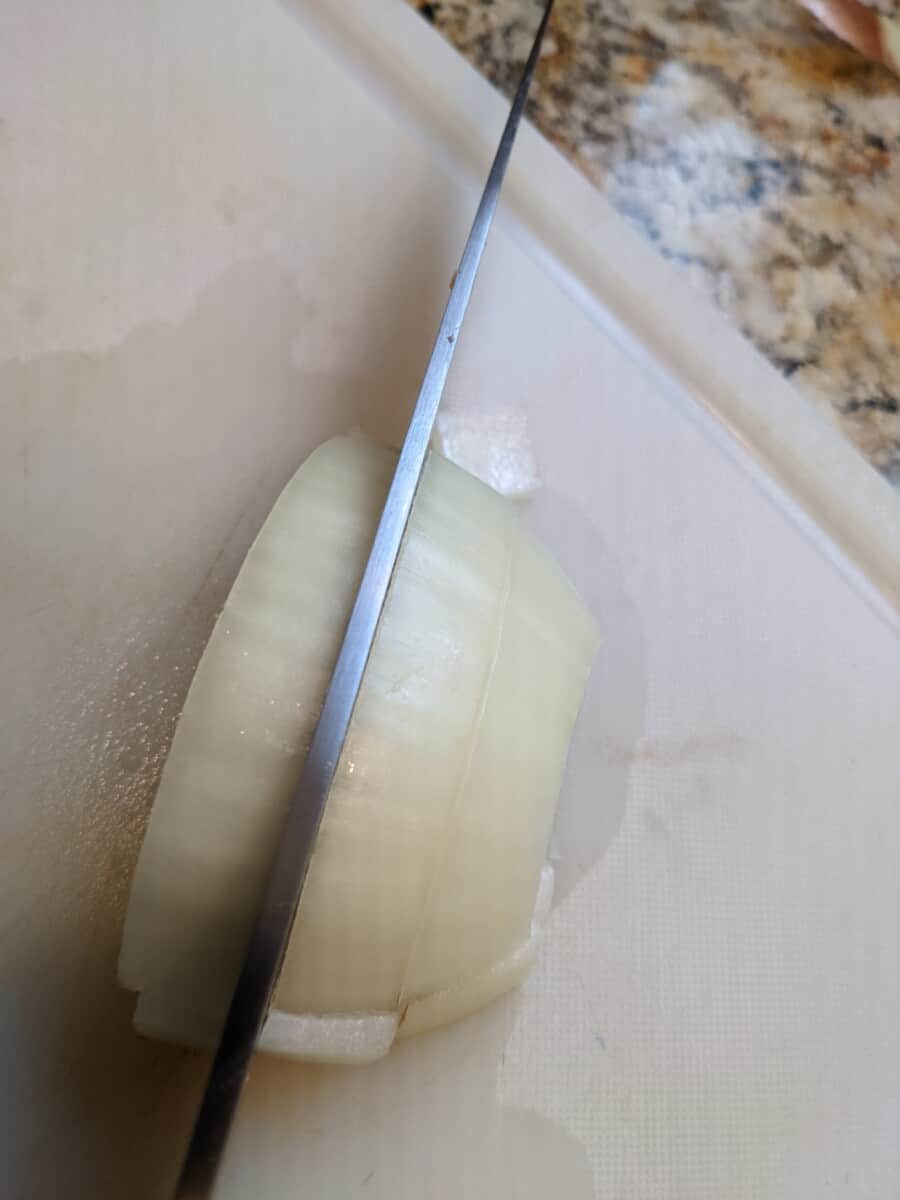
If you’re just cooking for one, you’ll probably want to slice it in half again. Or not. I won’t stop you from eating a whole half!
Now, as usual, make some slices:
Rotate and slice again into squares (some guides for dicing onions tell you to slice it horizontally too, but that’s not necessary for this recipe):
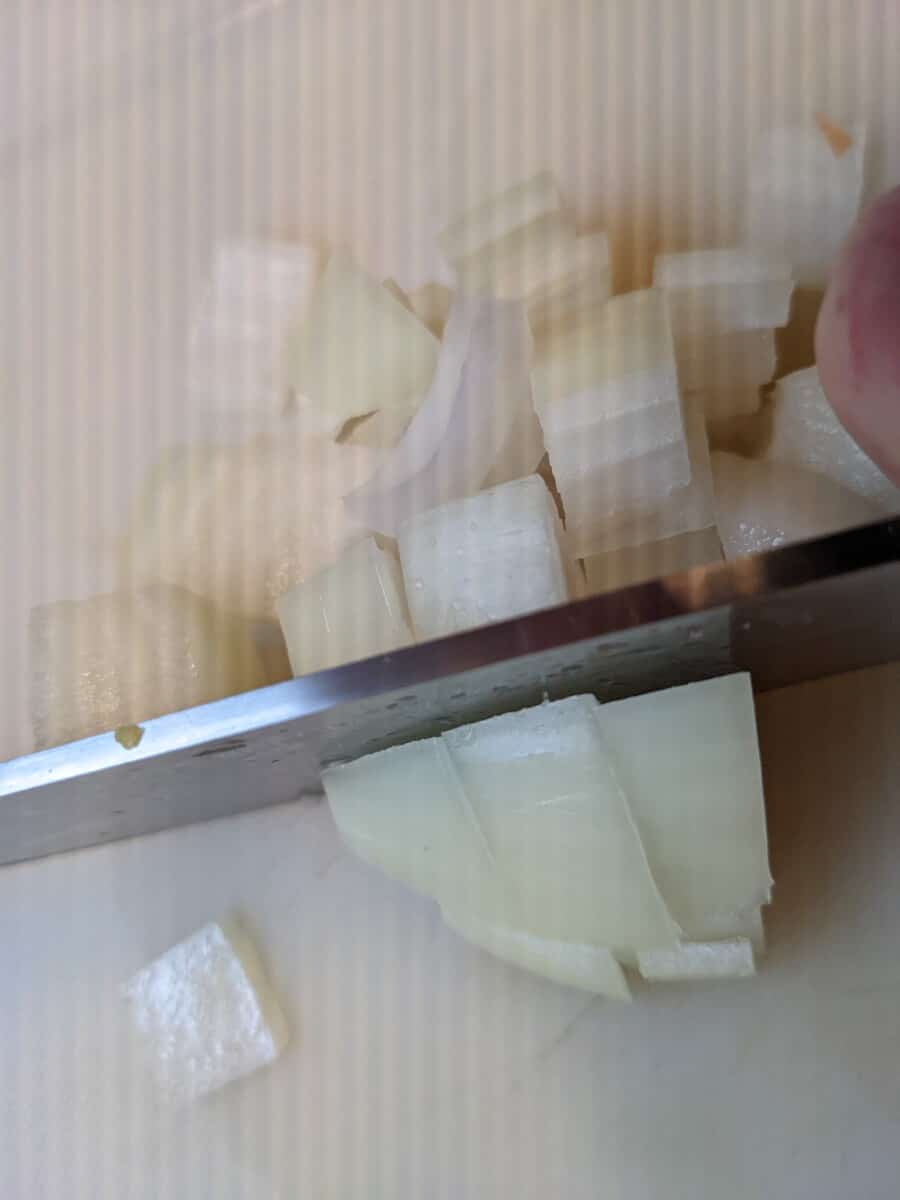
(Hm, not sure what those weird lines are on that photo.)
Bonus veggies:
You’ll be totally fine with just onion, sweet potato, and zucchini.
But you can easily upgrade your meal for more flavor, nutrition, and variety by adding or swapping in other vegetables.
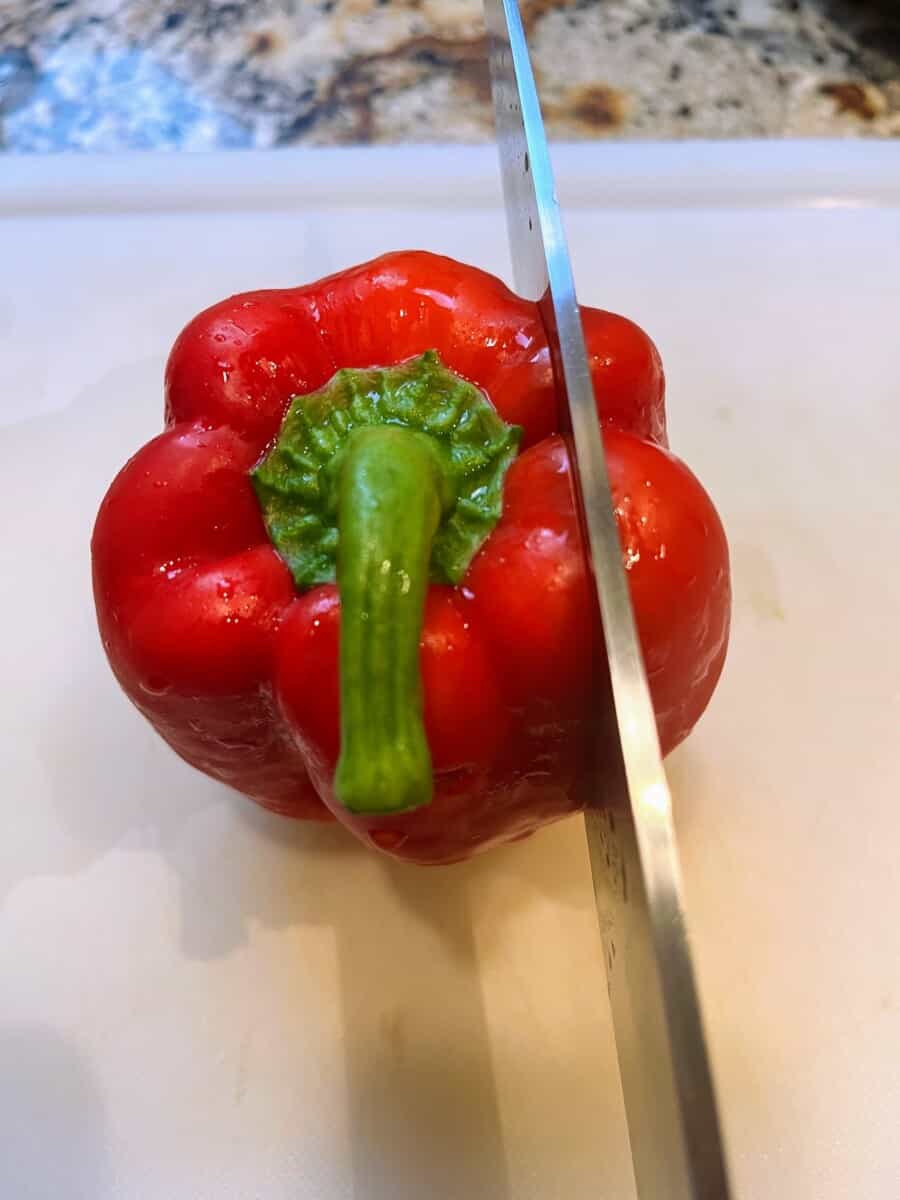
Here’s how to do red pepper, which can be just a bit tricky the first time:
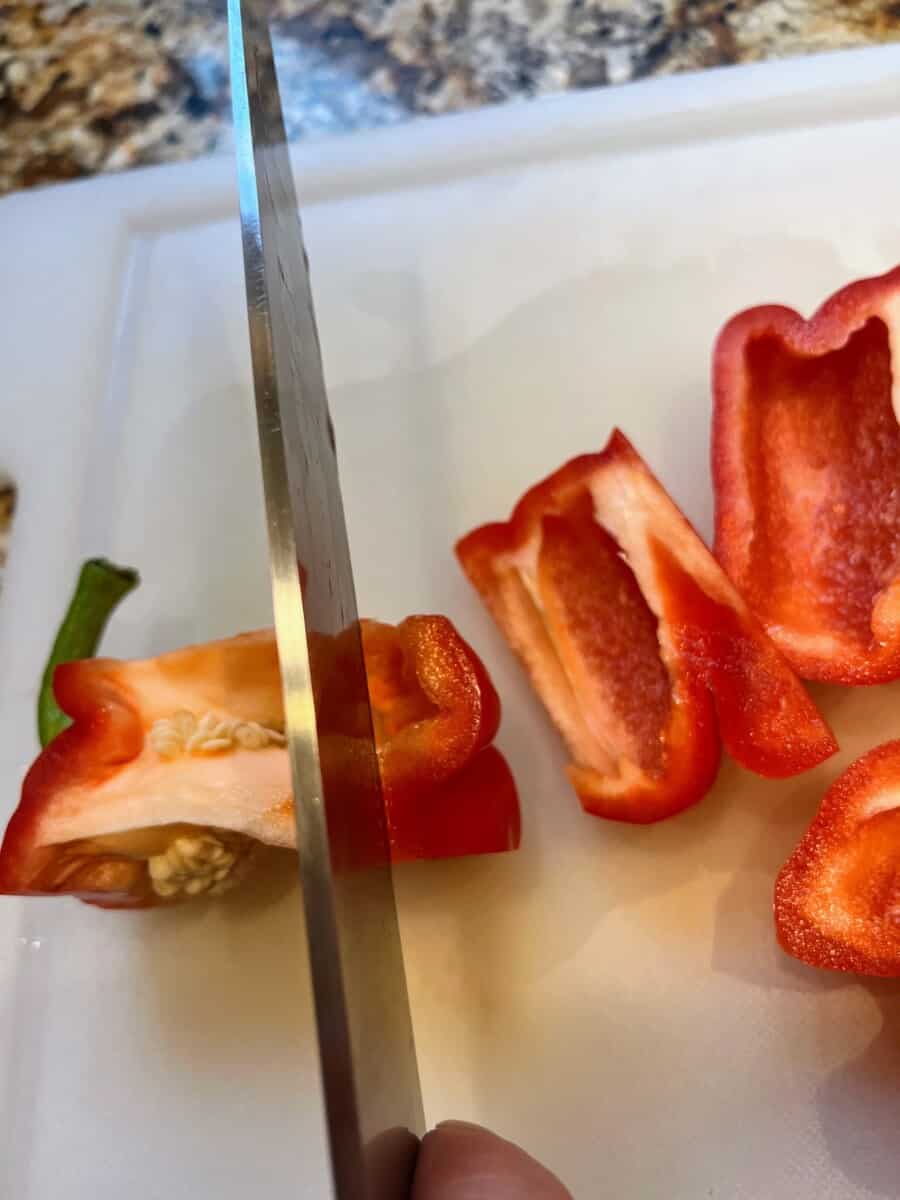
After washing, you’re going to slice off four sides as if cutting a square from the top.
Start by slicing off one side:
Then another:

Then the remaining two:
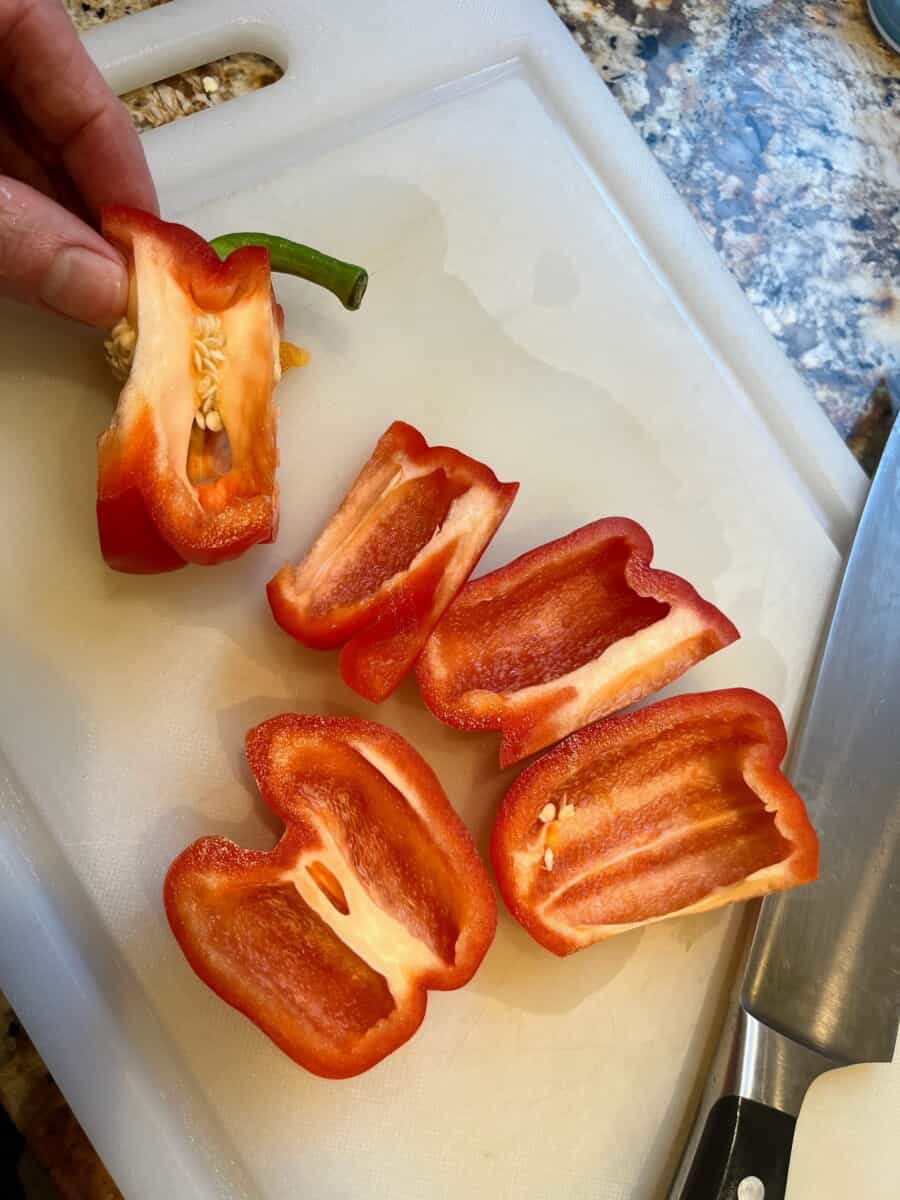
You can stop there, but there’s also a good little chunk left on the bottom:
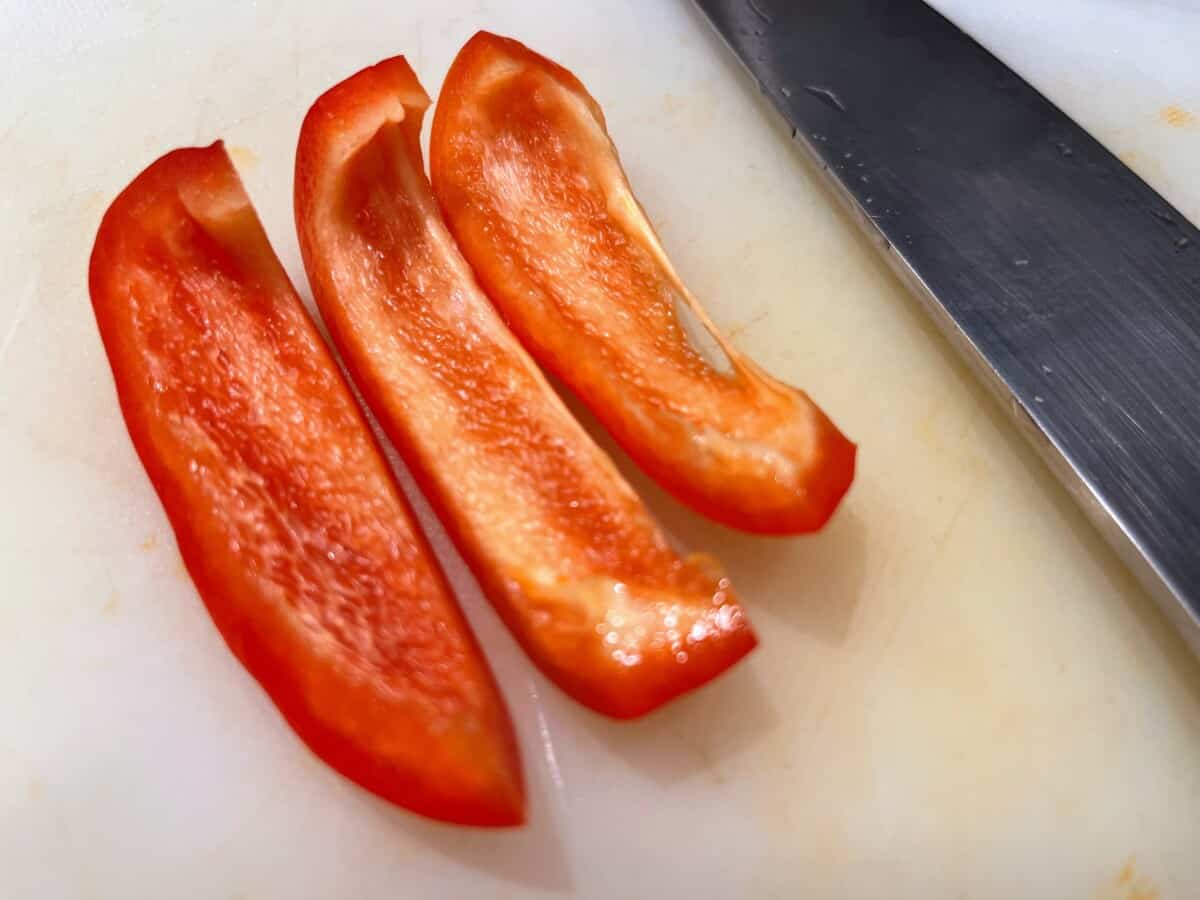
Now, one at a time for each of the four slices, cut them lengthwise:
Then rotate and cut into squares/triangles:
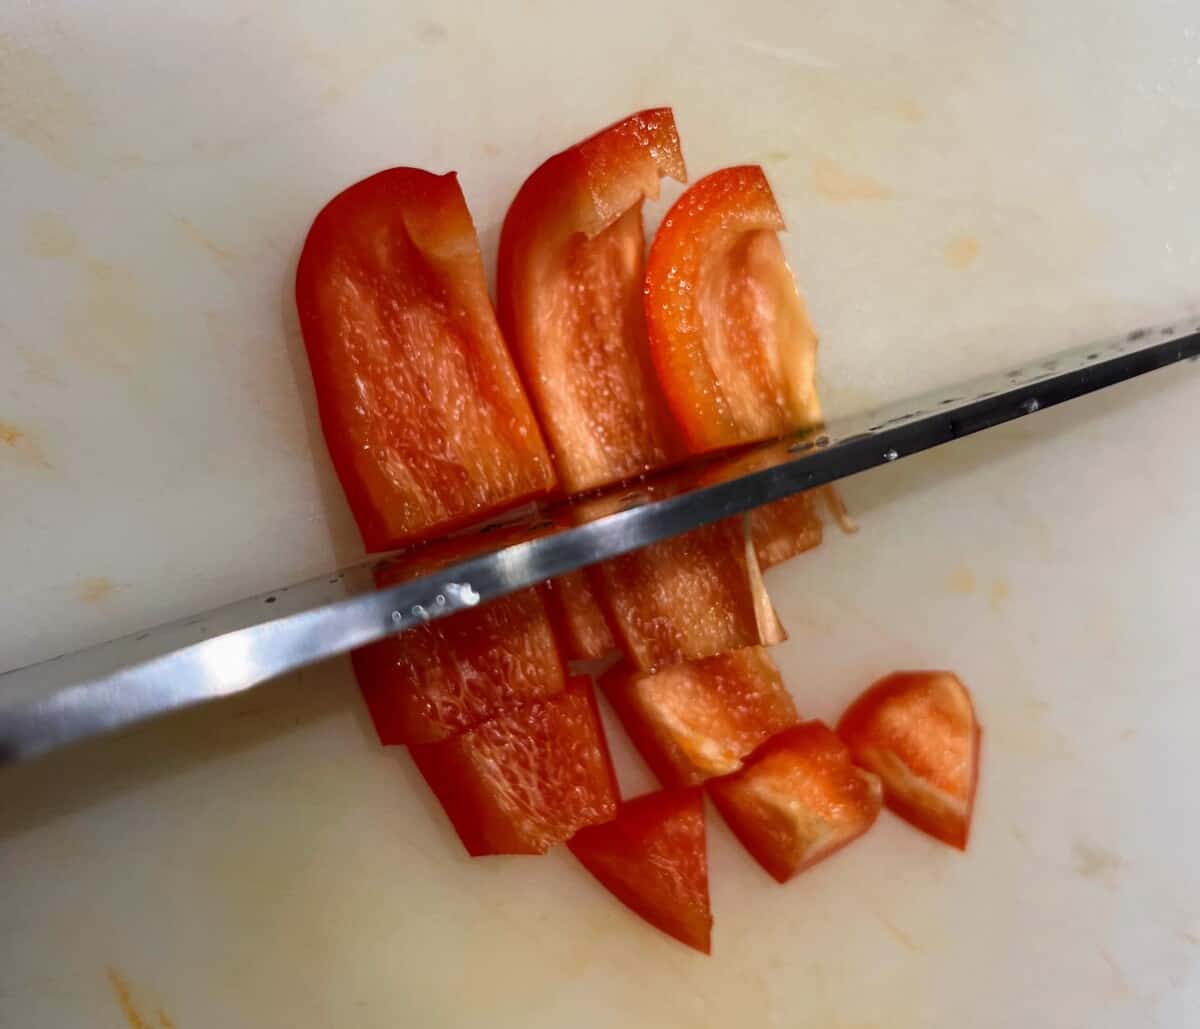
All done chopping!
In the photo below, you can see I’ve added those red peppers as well as some yellow potato (which you chop exactly the same way as a sweet potato):
I know it might sound crazy right now, but once you’ve practiced for a while, it should only take you less than 2 minutes to get to this point (especially if you’re starting with the other half of each vegetable from yesterday that you saved for later).
Here’s my real timer at this point (I started with leftover chunks of onion and red pepper from yesterday, so let’s say this is 2 or 3 minutes instead if you’re starting from scratch with everything—but also remember that every day you’ll likely be starting with a few leftover parts from the previous day):

Step 3: Start cooking
This isn’t critical, but you can begin preheating the pan when you’re about halfway through chopping the veggies. Otherwise, just turn on the heat when you’re done prepping.
Either way, put the pan on low-medium heat (i.e., the flame around this big if you’re using a gas stove):

Once it’s warm, add a good amount of olive oil:
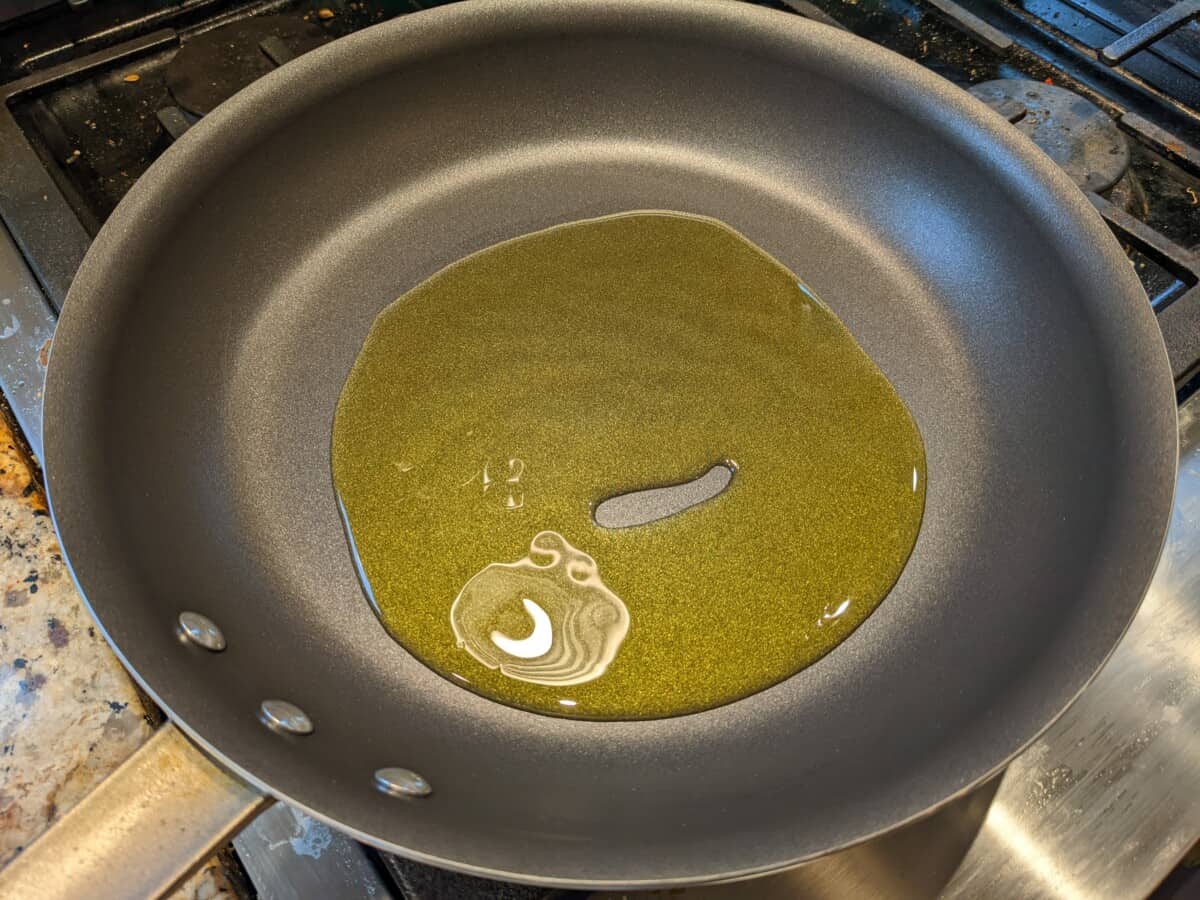
Don’t bother measuring. Just make a kind of circle as you pour. It’s especially easy if you transfer your olive oil into a dispenser like this one.
Then add all your vegetables at once:
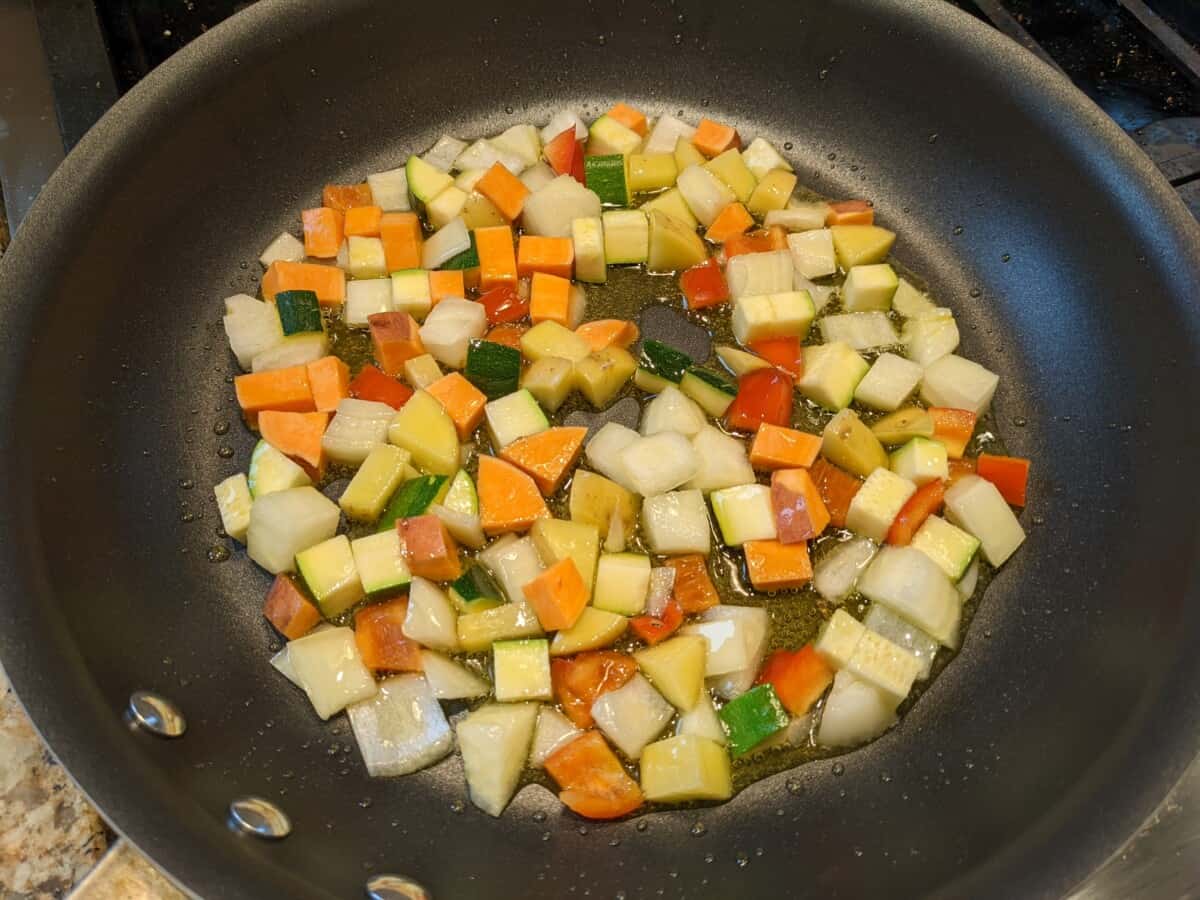
Give them a quick stir / flip around with your spatula so that pretty much everything is covered in oil.
This is basically just a balancing act between health and taste. The more oil you use the tastier it’ll be but a little less healthy. As you can see, I personally choose to err a little on the side of lots of oil 🙂
Then, don’t touch anything for a while so it can brown (i.e., get crispy and yummy).
If the oil starts spitting and making a mess, you can put a splatter screen on top:
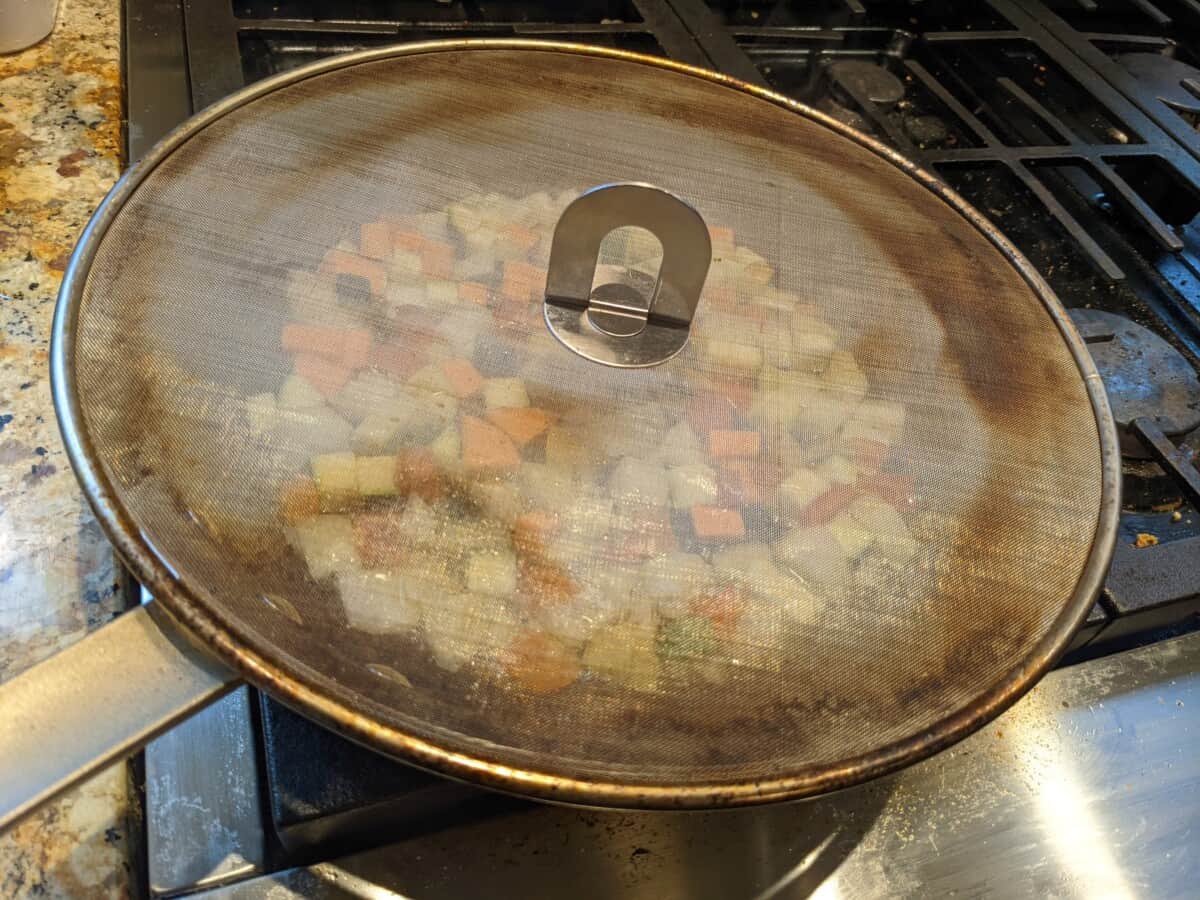
Let it cook for around three minutes and it should look something like this (i.e., many of the vegetables starting to turn a little brown and crispy). If not, cook a little longer until that happens.
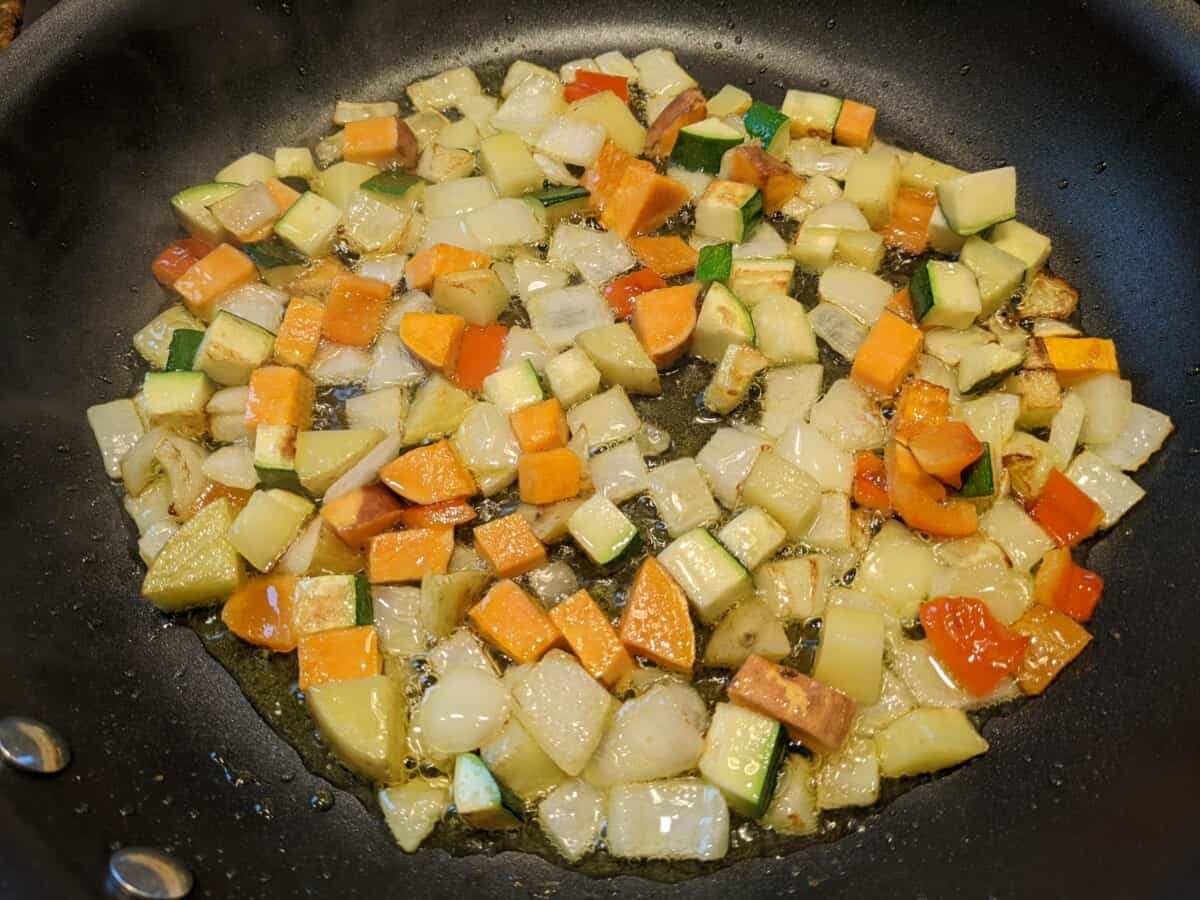
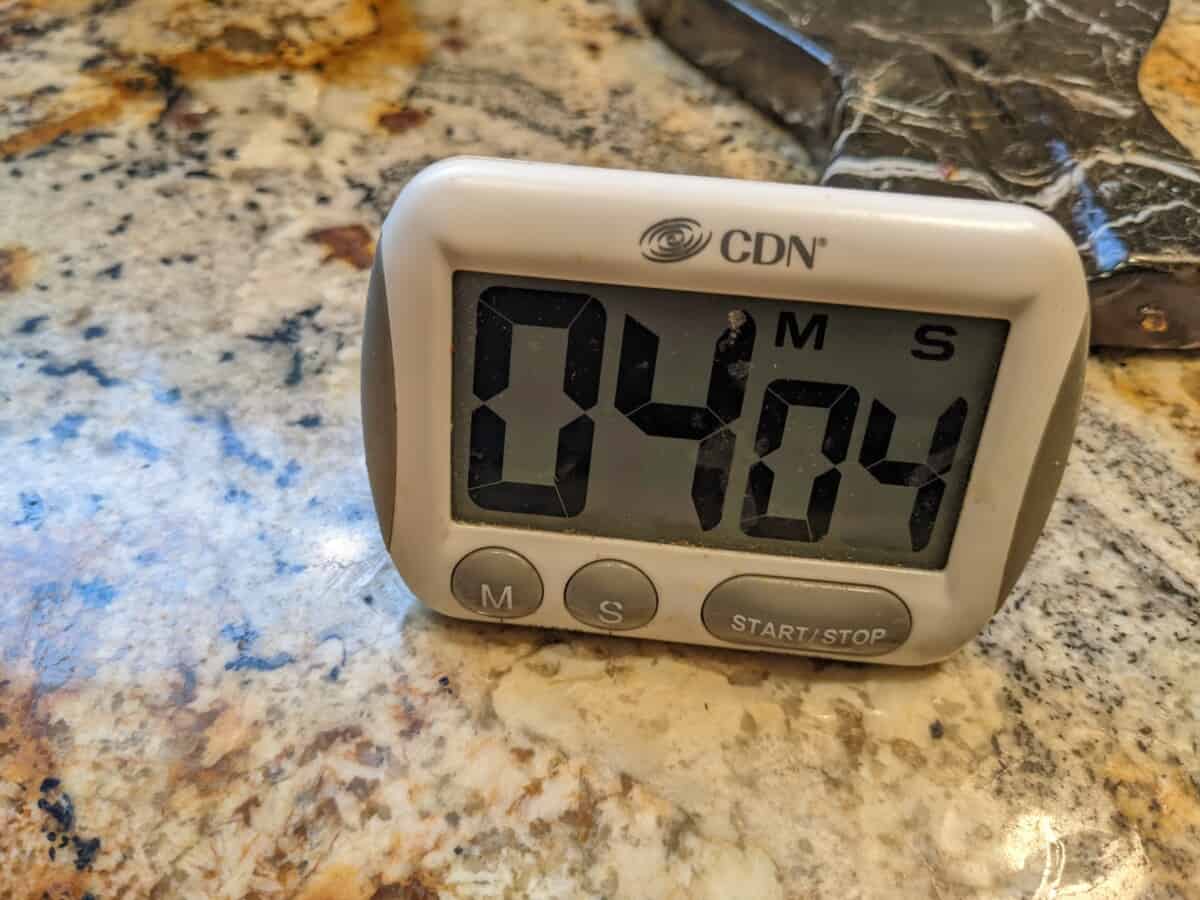
We’re now at the four-minute mark:
Step 4: Season
Now that the veggies have cooked a bit, it’s time to add salt and seasoning.
FYI, why didn’t we just do that at the beginning? Because salt causes moisture to be released from the vegetables, so they don’t brown as well if you do it too soon.
But, it’s not a huge deal either way. If it feels easier, just be crazy and throw the salt and spice in right at the beginning when you add your vegetables 😆
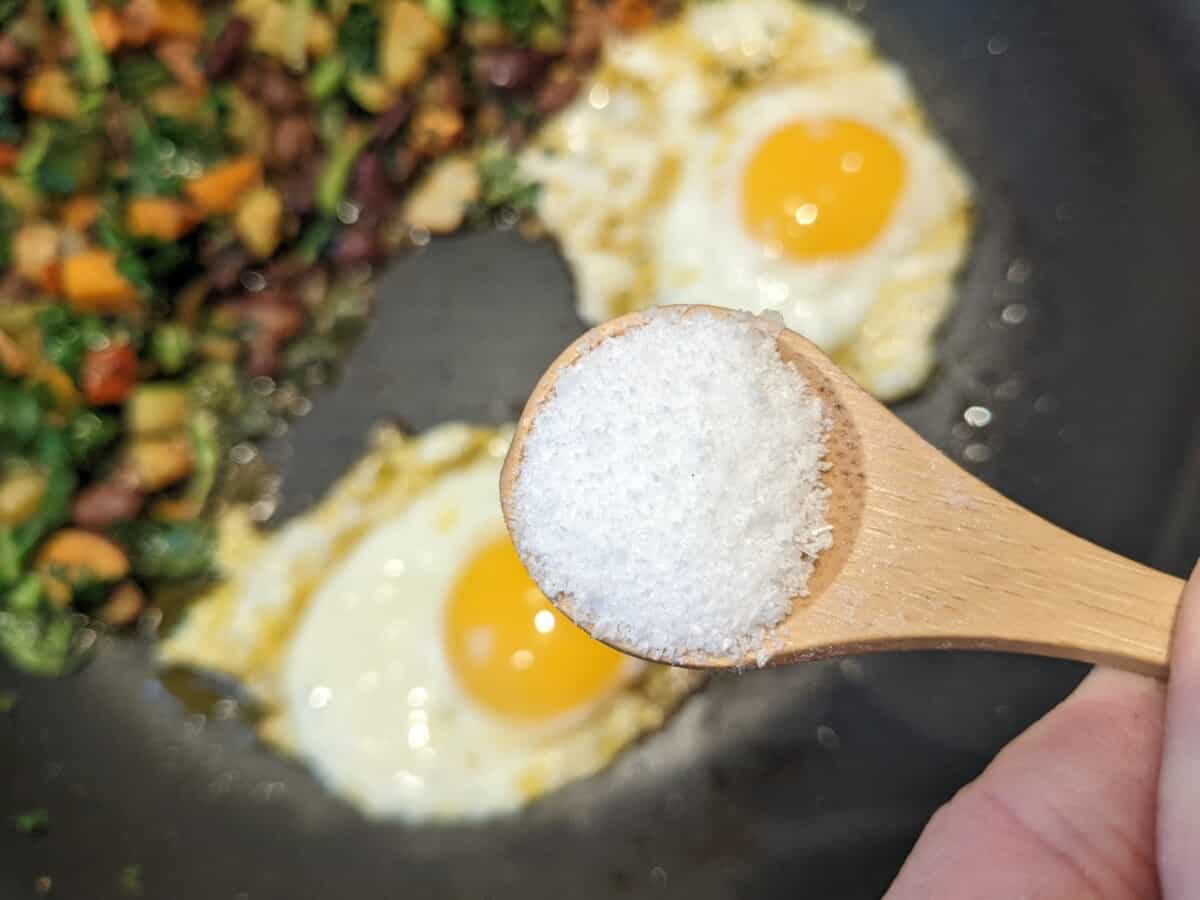
When it comes to salt, use a fairly generous portion. You can use a salt shaker if you have to, but they’re not ideal because they release so little salt at once and it’s hard to measure how much you’re using.
Pro chefs just grab salt with their fingers or a spoon from a container like this one.
So, about salt… It’s kind of a big deal.
There’s a weirdly huge amount of conflicting and confusing info out there about the best type of salt to use, so let’s skip all that.
I’ve done the research, and you should use Diamond Crystal Kosher Salt. It comes in a box like this, which you can empty into a bowl or a salt container like I just linked to:
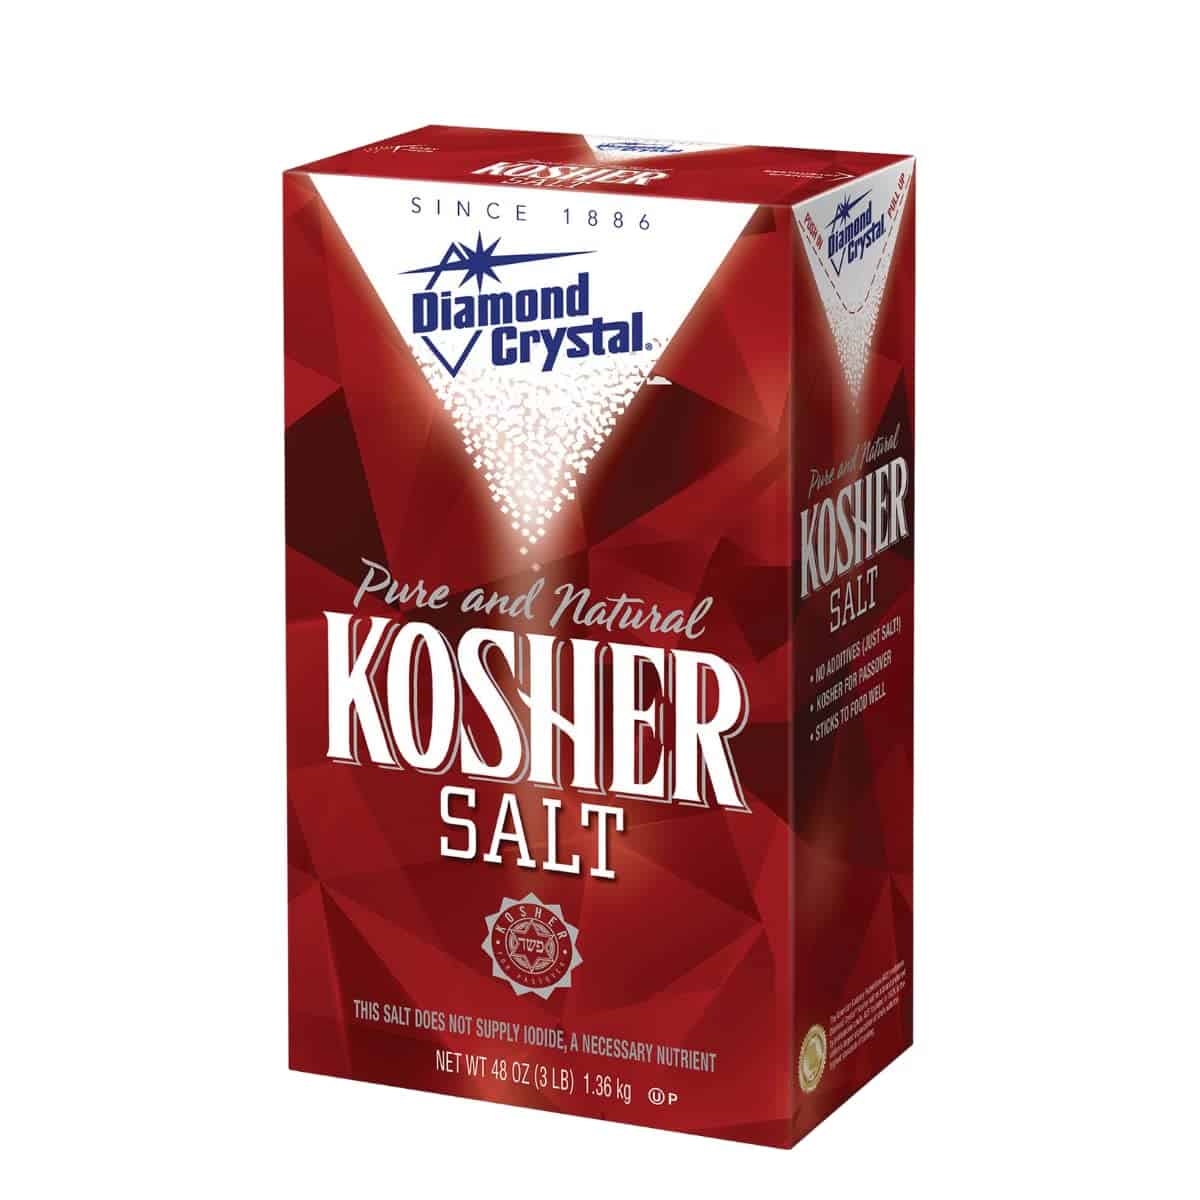
It has a great texture that makes it easier to hold in your hand and measure with your eye.
It’s less “strong” than the shaker salt you might be used to, so you’ll probably end up using a lot more than you think.
But, the rule with salt is always to start with a little, then taste as you go, and add more as you need it. You can always add more, but you can’t take away if it’s too salty. (Well, there are tricks for balancing out too much salt, but for now just start with a little, taste, and add more if it needs it.)
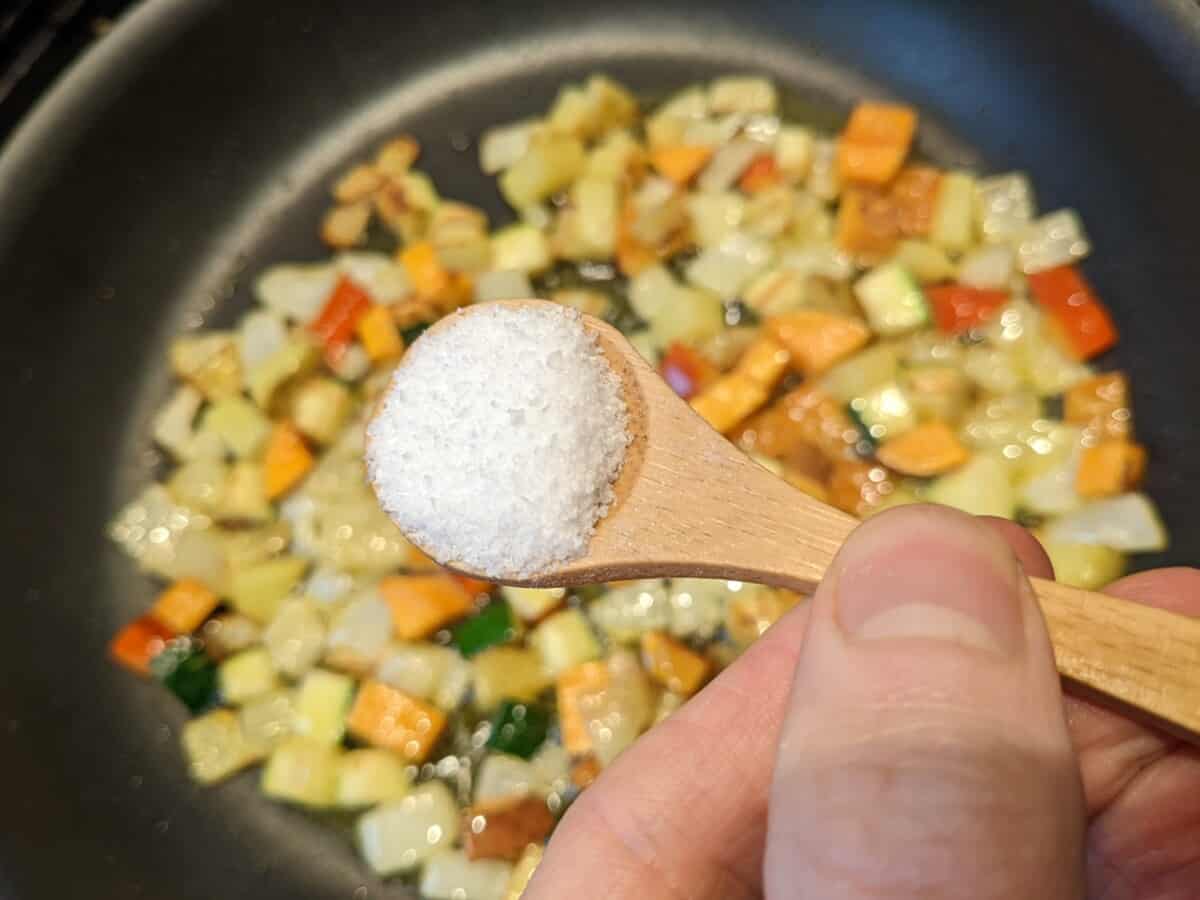
Here’s how much I used for this many vegetables (very very roughly, it’s around 2/3 tsp in this case—yeah, that probably feels like a lot; it’s ok 😁):
Other spices:
This is the spice mix I use by far the most often: Trader Joe’s Mushroom & Company Multipurpose Umami Seasoning Blend.
(And by the way, it doesn’t taste super mushroomy, so you should be fine even if you think you hate mushrooms, as I did. Rather, it just tastes more like a kind of robust, almost smokey depth of general flavor.)
If you have a Trader Joe’s nearby, this mix makes things cheap and easy (and Whole Foods has a similar one called Organic Umami Seasoning). I keep my pantry stocked with four or five of these at a time, just in case TJ’s has a shortage.
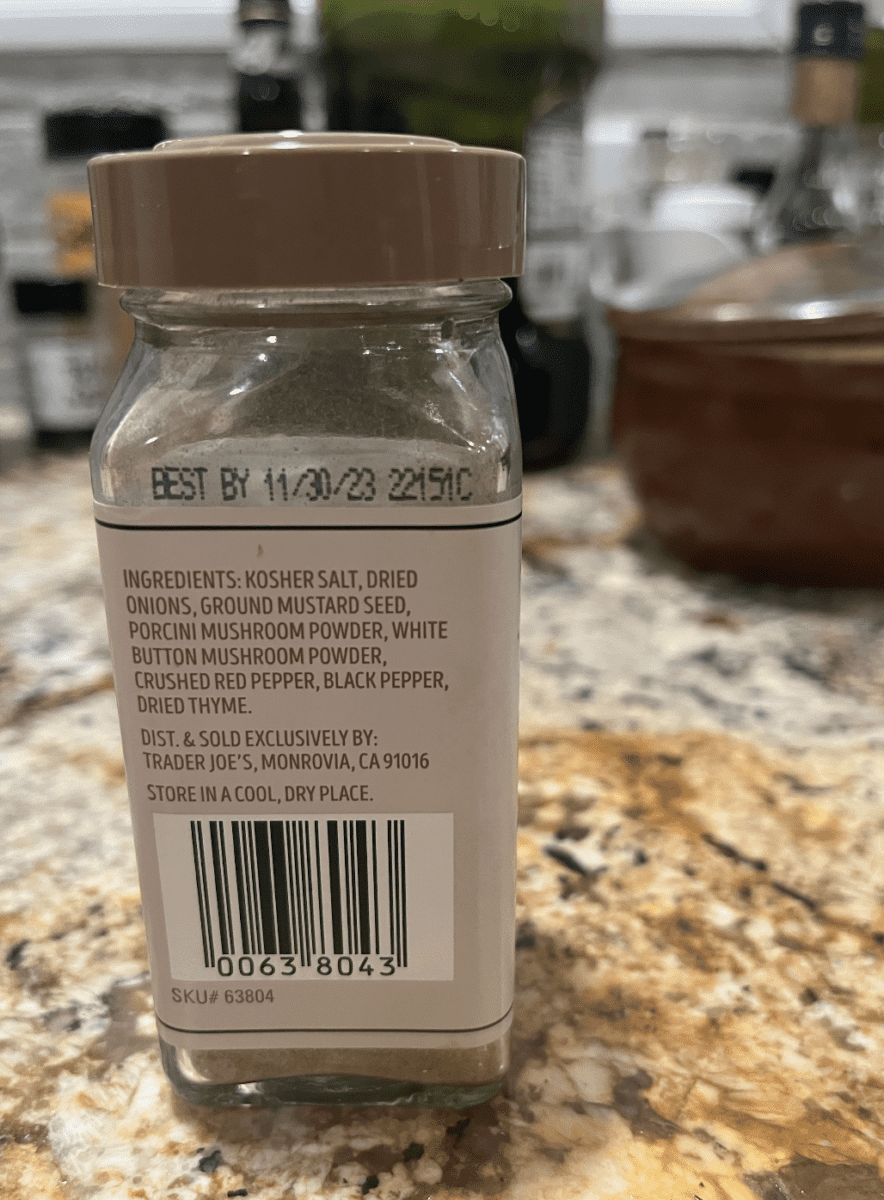
Here’s the back so you can see what’s in it (based on this ingredients list, I imagine you could get a similar effect with a mix of salt, dried onion powder, mustard seed powder, and mushroom powder):
Honestly, your meal will taste amazing with just vegetables, oil, salt, and this one spice mix. That’s it.
But in Part 2, I’ll give you some alternative spices to try as well.
And if you don’t have an “umami” spice, try cumin.
In any case, add a good amount of spice (probably more than you think; but, you can always start with just a bit and add more if you want more flavor):
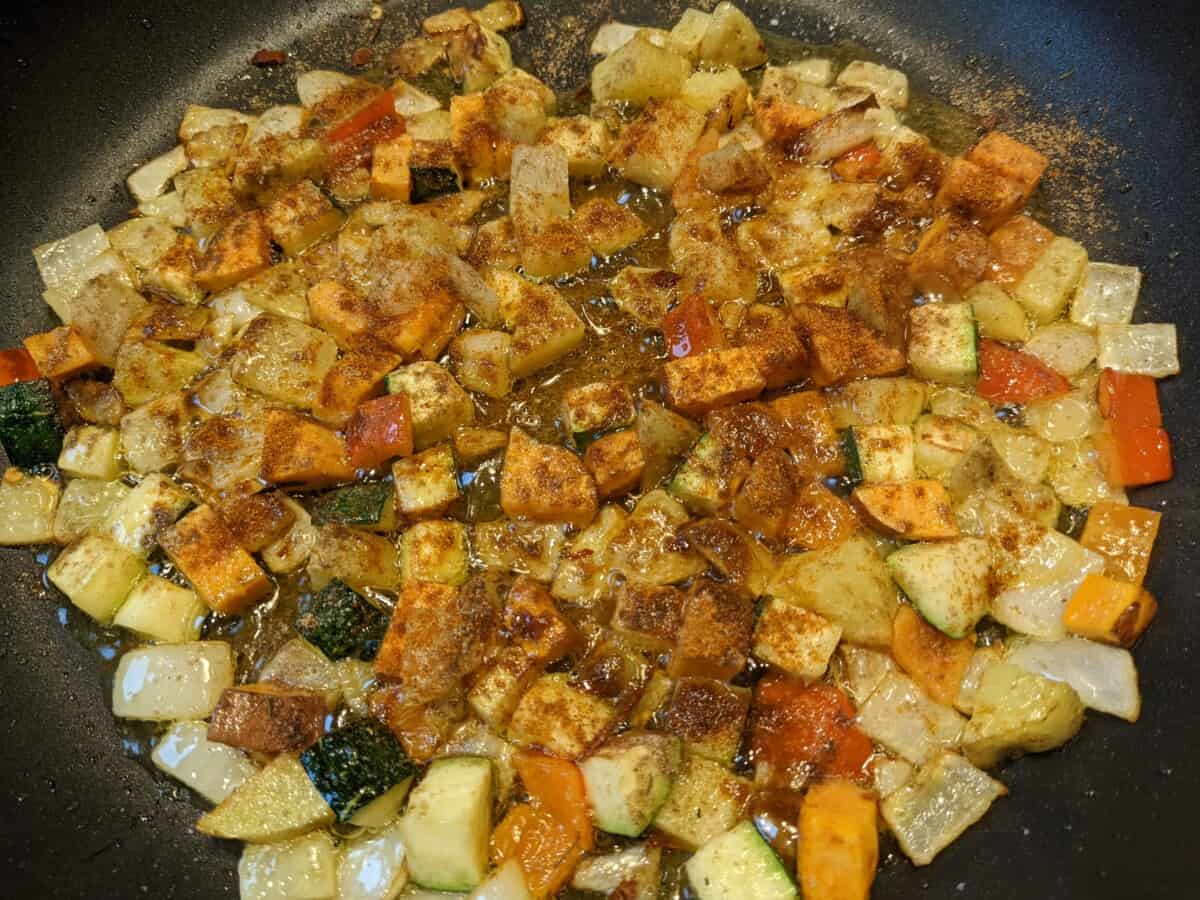
Stir well to coat it all, then let it cook for 3-5 minutes without touching it.
Step 4a: Begin clean-up
During that 3-5 minute cook time is a good point to start cleaning up (remember: you don’t have to keep stirring—just leave it to brown).
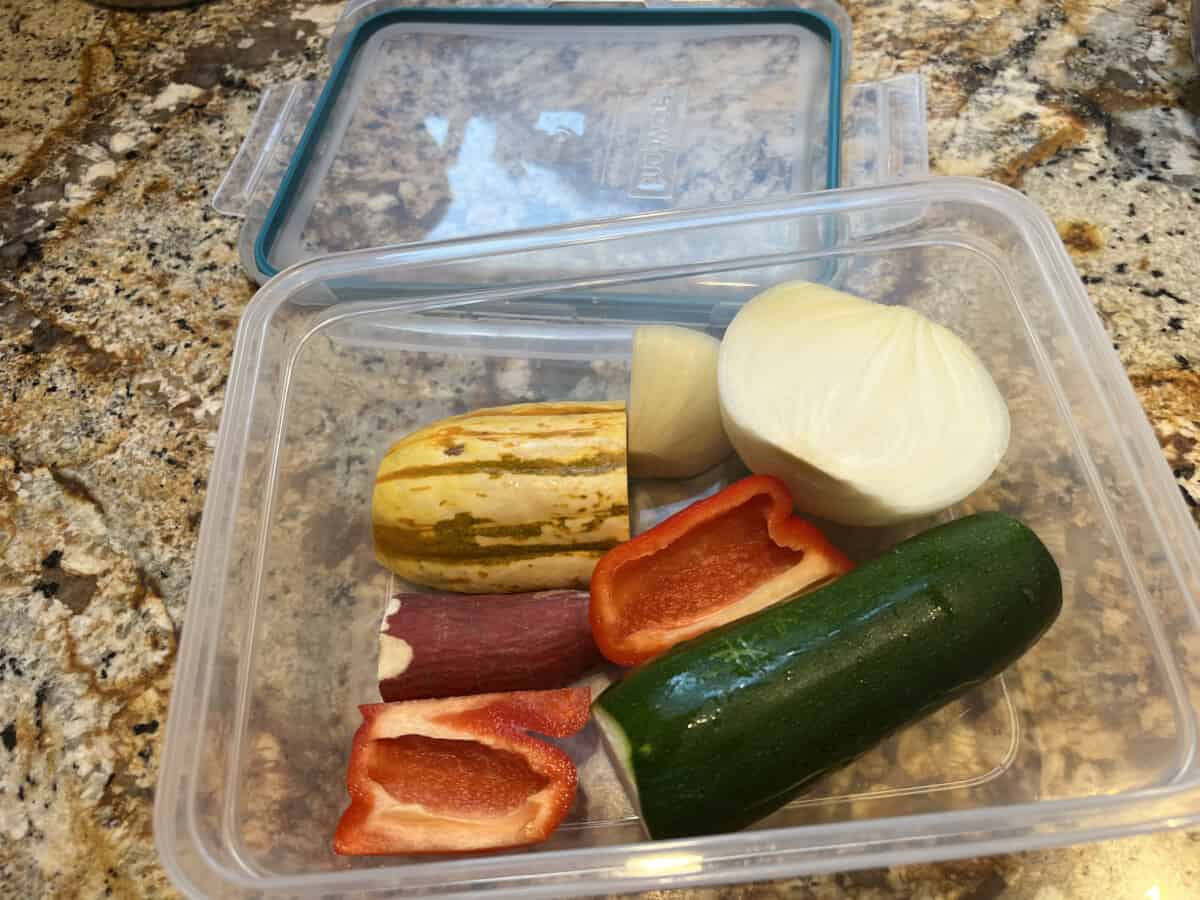
Since I almost never use the entire vegetables, I store the remains in a plastic container. That way, they’ll already be washed and ready to use tomorrow.
This makes prep time even faster since most days I’m starting with already-washed veggies.
Here are my favorite plastic containers that can hold half a zucchini, onion, and sweet potato (if it’s a wide sweet potato, you can slice it in half vertically for storage in here). And since the container is airtight, the veggies won’t dry out even after a few days:
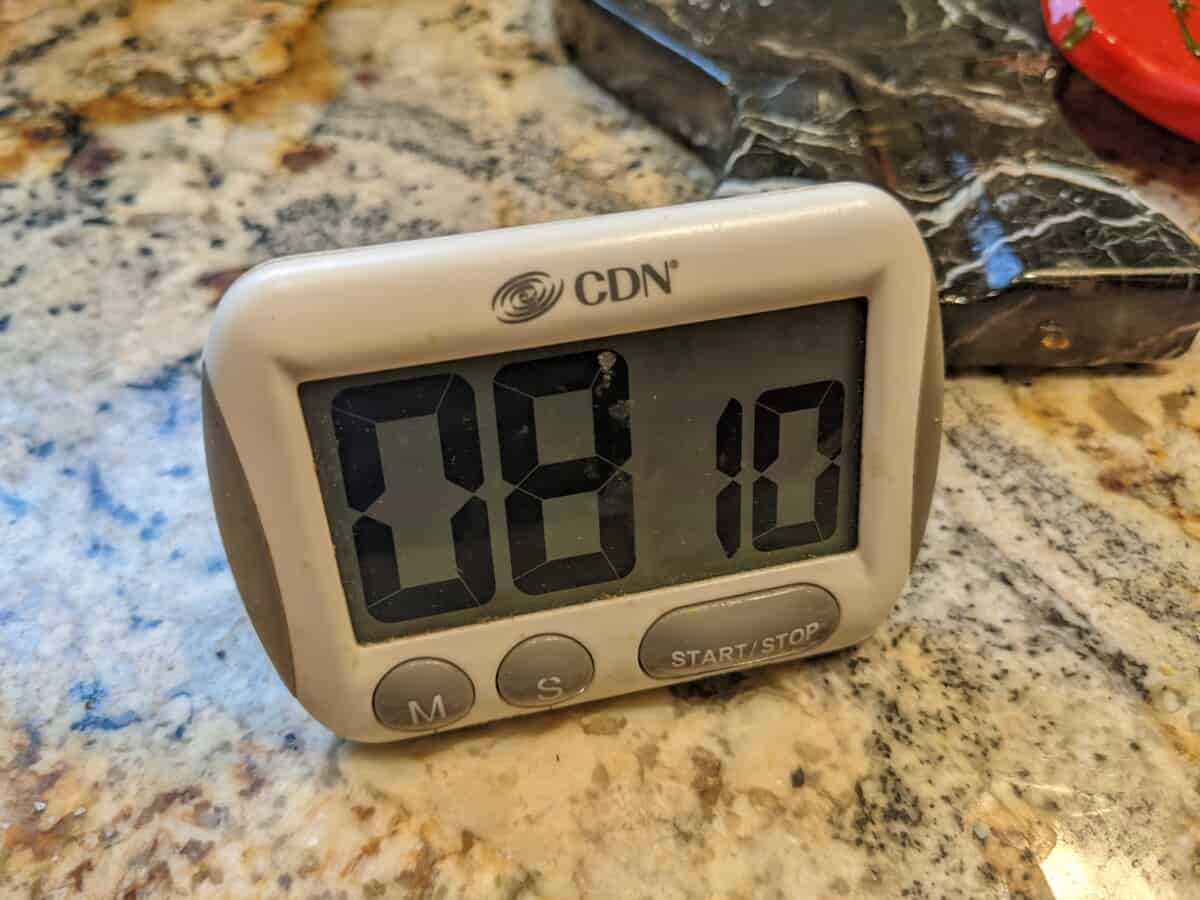
We’re at the 8-minute mark:
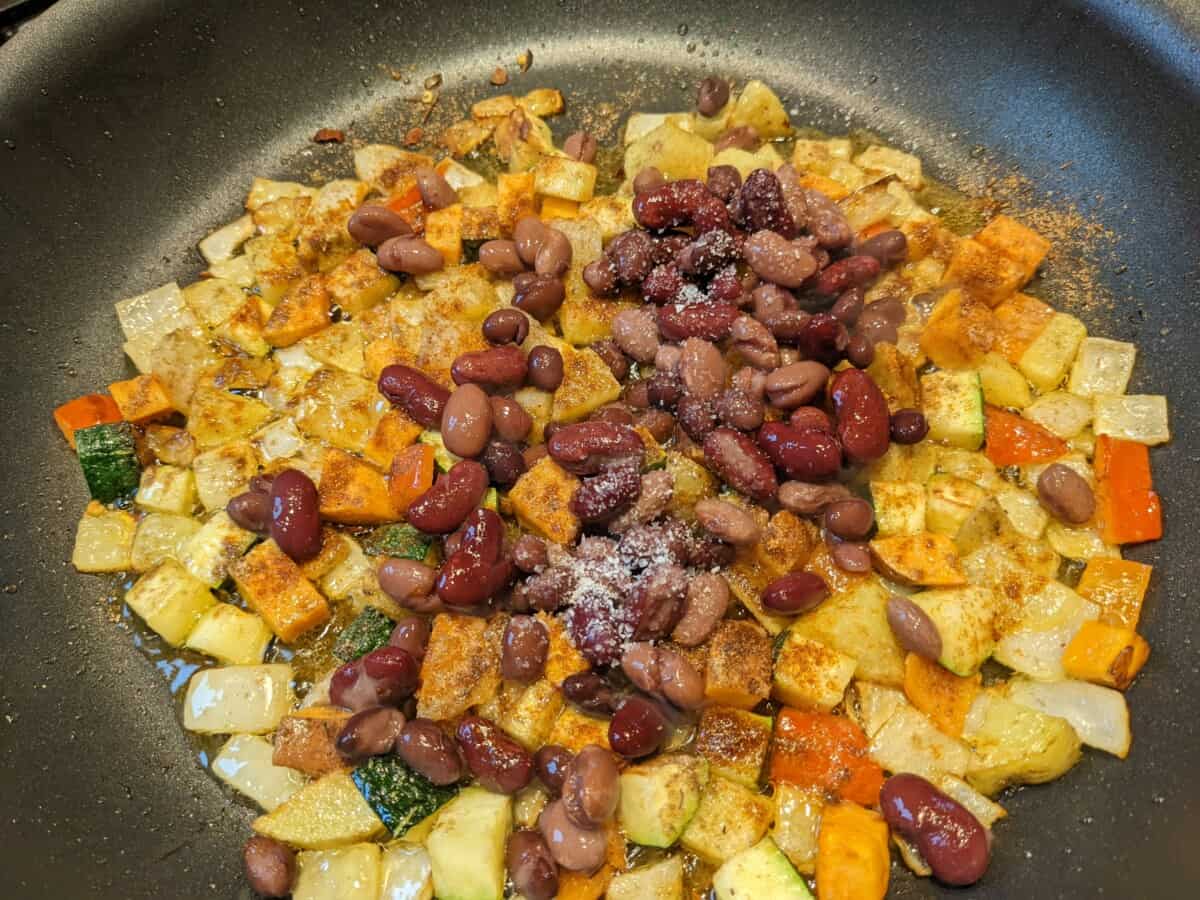
Step 5: Add beans and any delicate veggies (like kale or spinach)
Open your can of beans, and drain the liquid by putting them in a strainer or just cracking open the lid so the liquid can pour out.
Add the beans to the pan, and I like to sprinkle a little more salt on them too. For 1-2 people, I’d probably only use 1/3 or 1/2 a can of beans (though you could certainly add more for extra protein).
(In the photo, I’m using a can with a mix of pinto, black, and kidney beans, but any one of those alone would be perfectly fine too.)
If you want to add some chopped kale or baby spinach too, now’s a good time:
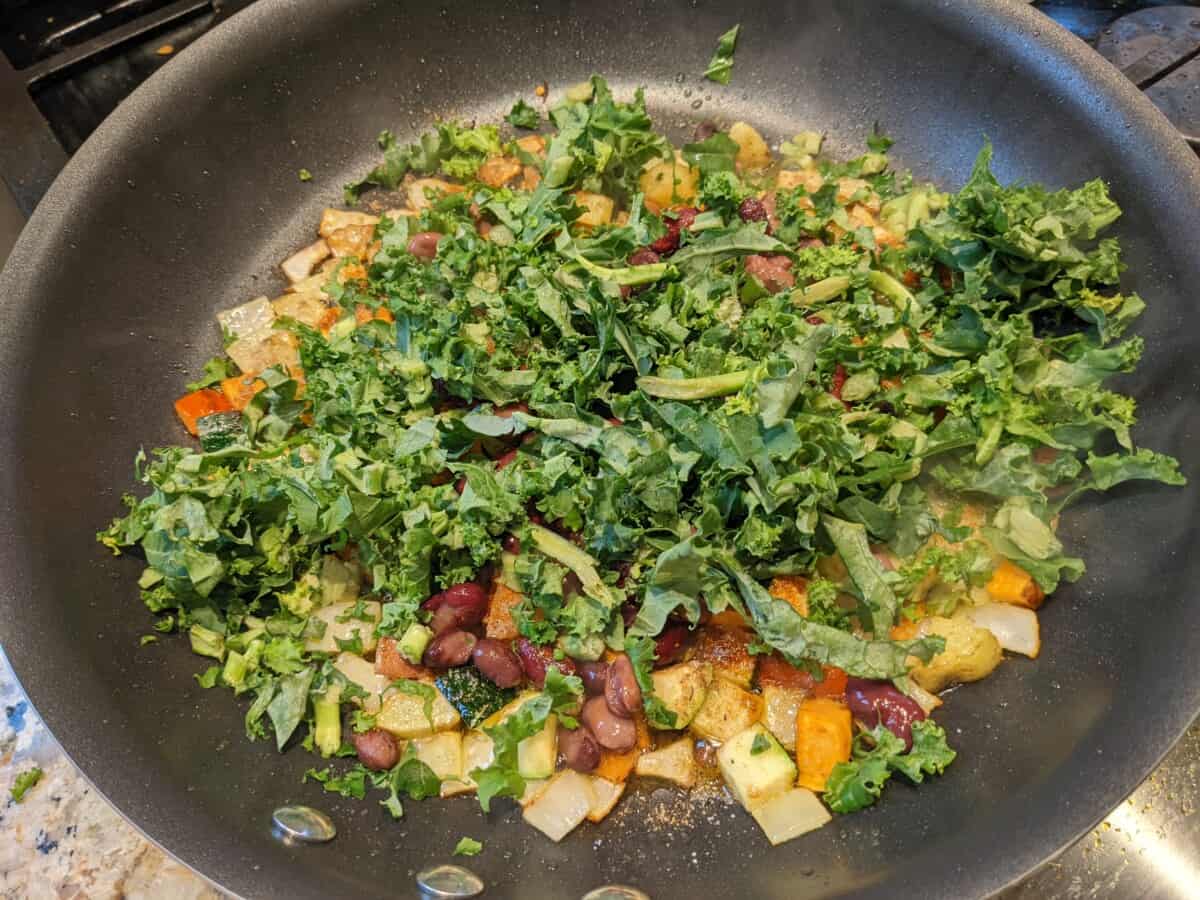
That probably seems like a lot of kale, but it shrinks as it cooks.
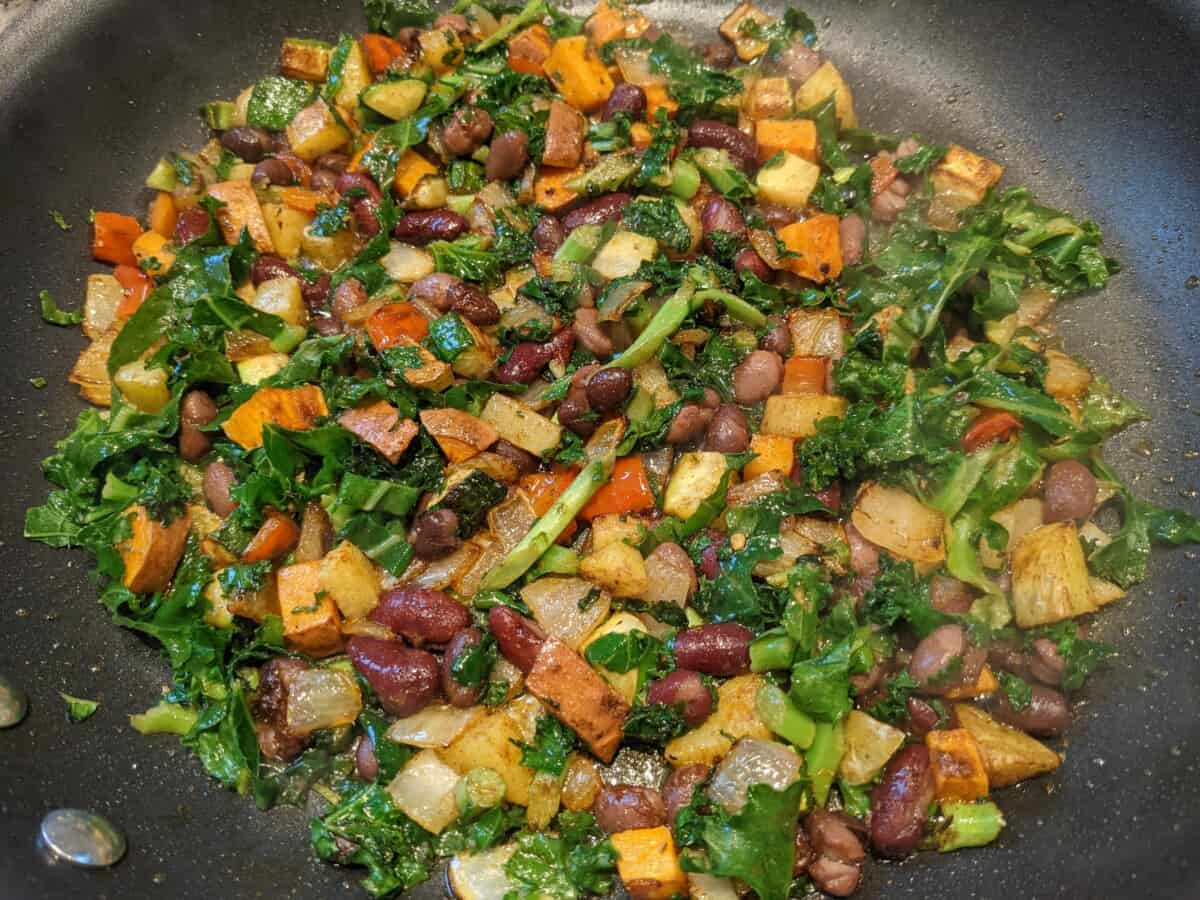
Now, stir all that together so it’s all coated in oil. Add a little more oil if you need to.
It should only take a minute for it to cook down:
Step 6: Cook the egg
Now that your veggies are pretty much done, use your spatula to push them to the far end of the pan that’s mostly off the flame. That way, they’ll still keep cooking just a bit more, but not too much.
Push the pan back a bit so that the flame is underneath the front empty space.
Pour on a splash of oil, then crack an egg or two. (If two, make sure there’s space between them, and try not to let them touch each other. You can use the spatula to force one back if it starts spreading into the other one. Keeping them separate helps the edges get nice and crispy.)
By the way, here’s how to crack an egg:
I’ve tried all sorts of egg-cracking techniques, and here’s the easiest one: Tap it against a hard edge like your counter—as in, the 90-degree angle edge part, not the flat top or side.
Tap it firmly enough so it makes a smallish hole with cracks around it, but not so hard that it really opens and starts spilling out. Then, you should be able to split it apart with your hands.
After a few tries, you’ll figure out just the right amount of force so that the egg opens but doesn’t destroy the yolk.
P.S. If you get any little pieces of shell in there, fish it out with a larger piece of shell.
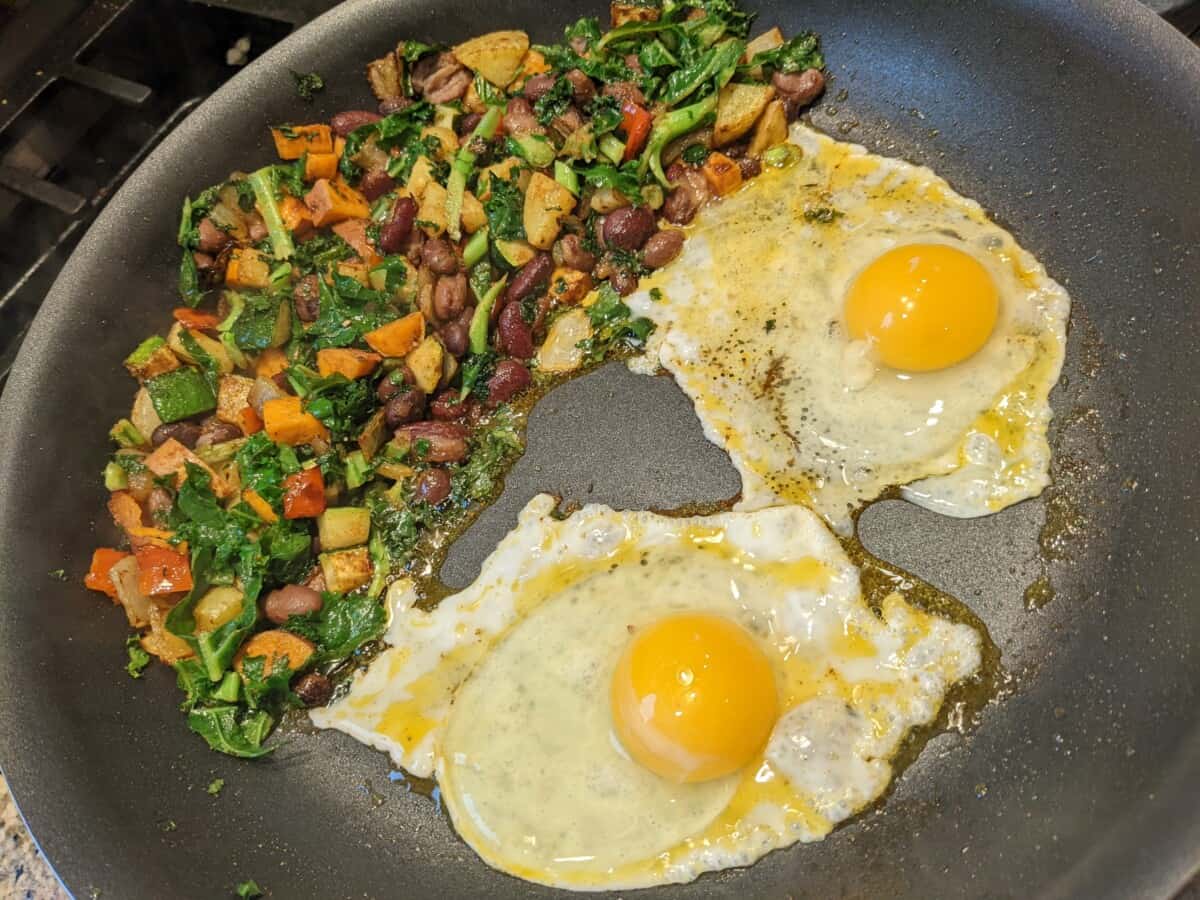
Once you’ve managed to keep the two eggs separate and they begin to solidify, don’t touch them anymore.
(Notice a theme? The secret to browning and crisping in general in cooking is to just leave things for a while with oil touching them—without stirring.)
Make sure there’s oil sitting around the edges of the eggs—that’s what’ll make them crispy. If there isn’t, pour a little oil around them.
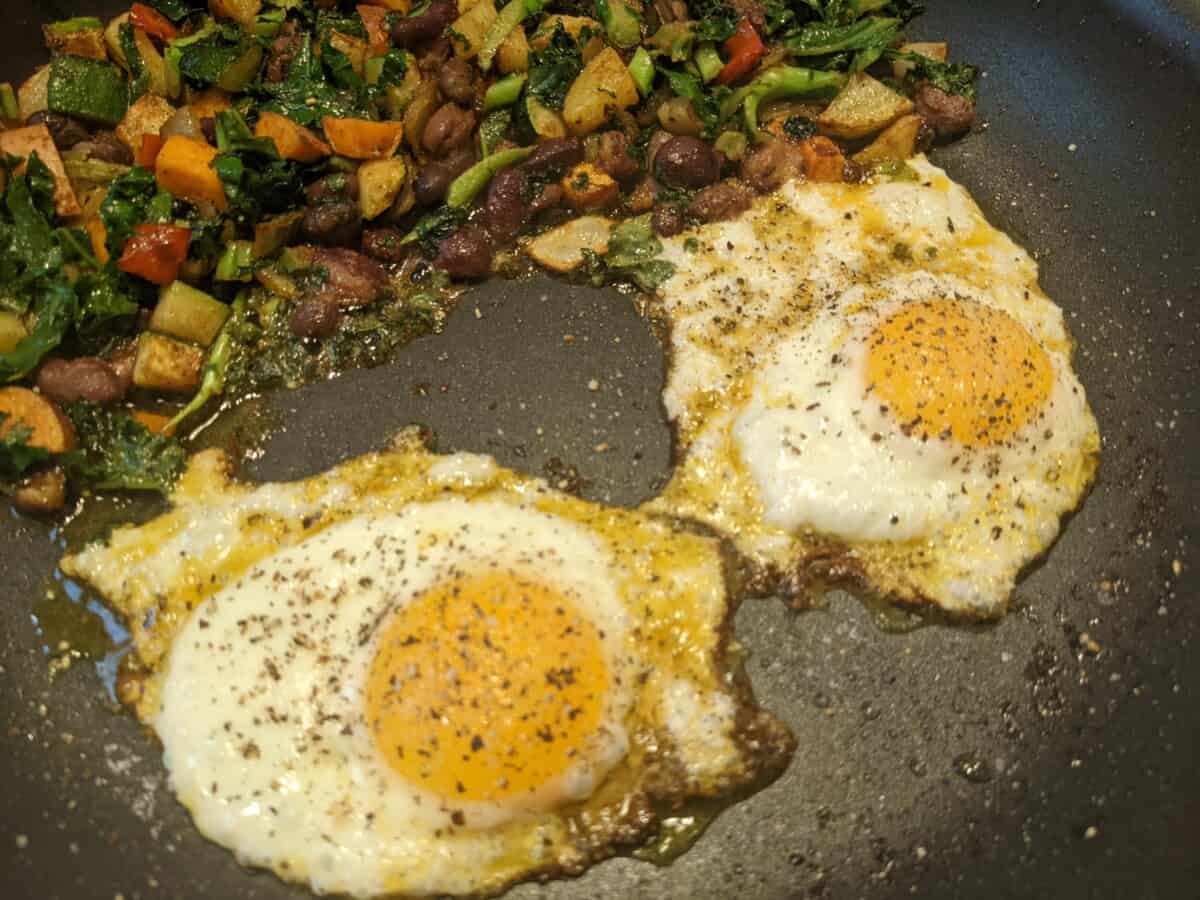
Now, after 3-4 minutes, it should look like this:
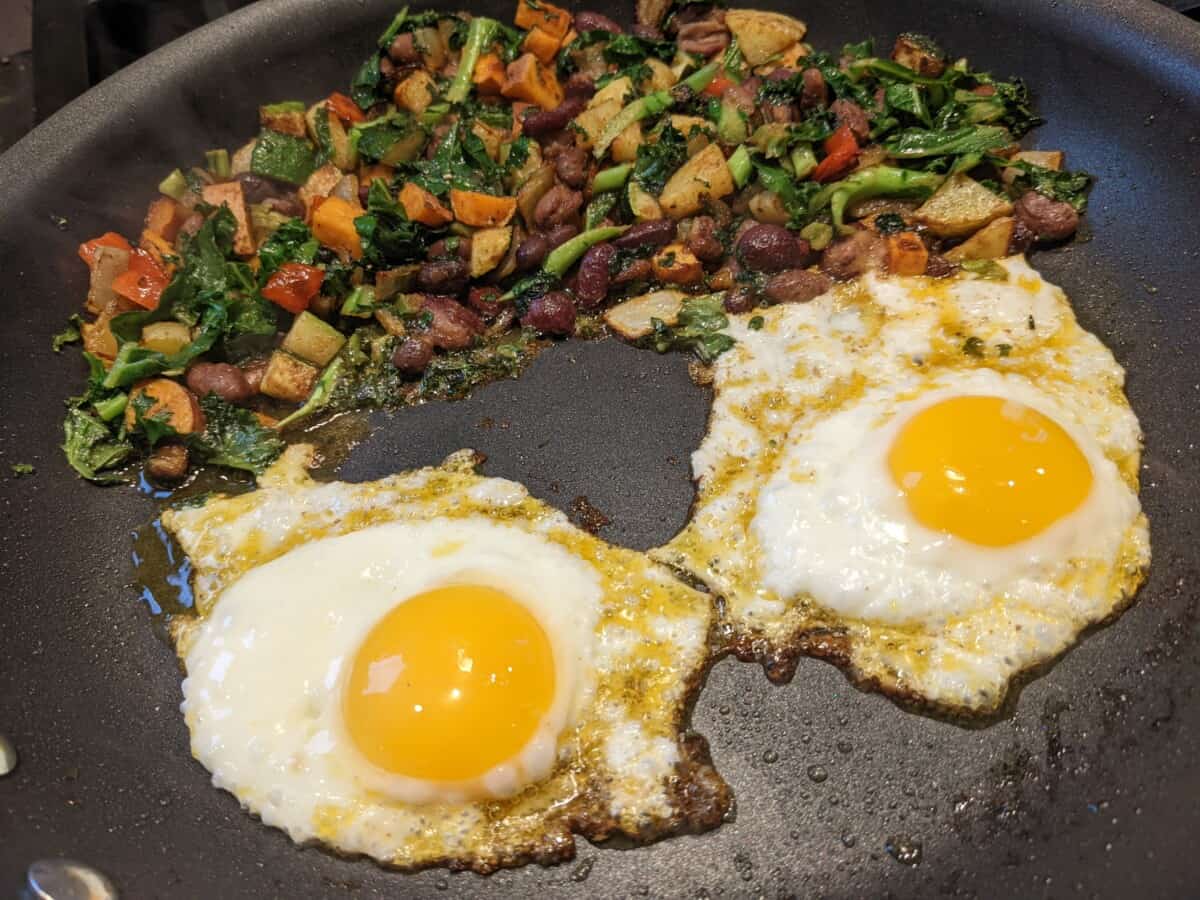
Notice the yummy crispy brown edges on the bottom. That’s what we’re looking for here:
- The whites of the eggs to be set (i.e., not liquidy);
- Most of the edges to be crispy;
- The yolks to ideally still be liquidy so they’ll burst when you poke them with your fork to eat them (at least, that’s how I like them—you can cook longer if you like firm yolks).
We’re now at the 12-13-minute mark:
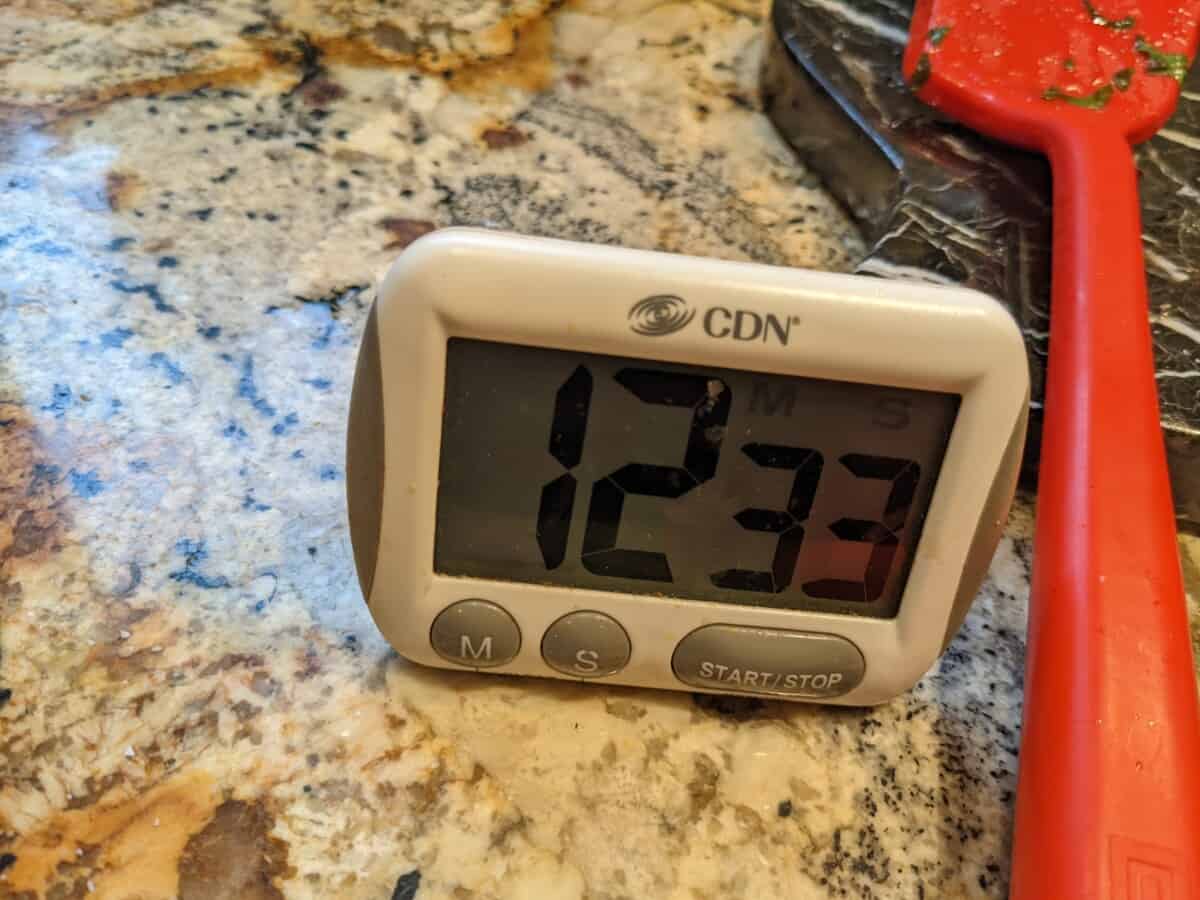
Sprinkle another good amount of salt on them, and add either a few pepper mill turns of pepper or a nice helping of paprika (pepper here is more common, but I’ve been gravitating toward paprika more lately since it’s a little less harsh of a flavor):
Now, carefully flip them so the yolk doesn’t break:
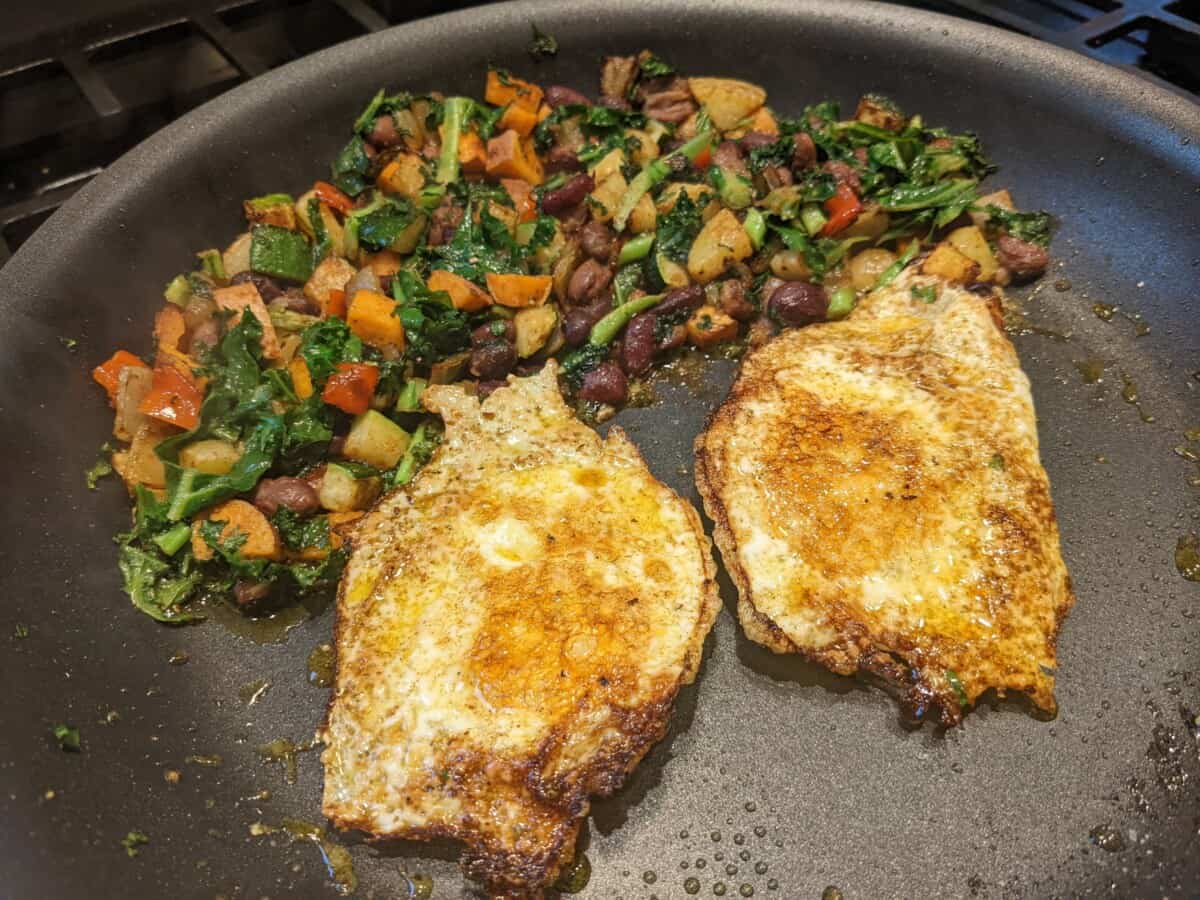
(If you used enough oil before, the bottoms should be nicely browned and crispy like that.)
Wait just a minute or so (you’ll figure out the right time for your stove and pan once you’ve tried this a few times).
But, if you want your yolk to be completely firm, wait a bit longer, or press down on your eggs when they’re upside down to force the yolk to break and cook faster.
Step 7: Enjoy
You’re done—time to serve:

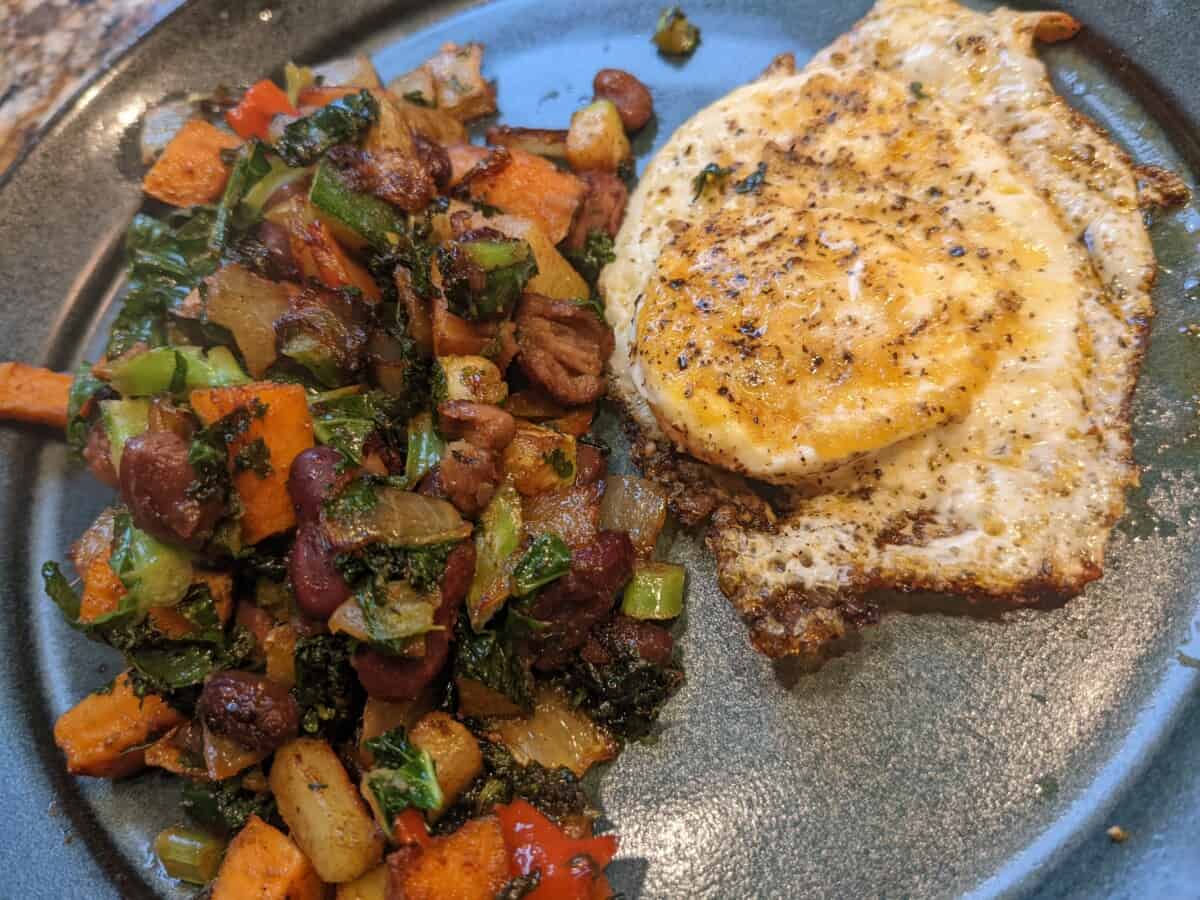
Total time: 13:40 for a light meal for two.
At this point, I’ve already put all the leftover veggies in the container in the fridge.
So, add another minute or two to the total time to put the spatula and cutting board in the dishwasher and to handwash the pan (I like to let it mostly cool first before washing so that the nonstick coating lasts longer).
🎉🎉🎉
That’s the basic template.
I cook this exact meal pretty much every day for breakfast/brunch, and I’ve been doing so for a few years now. Once in a while, I switch things up by swapping in other ingredients like yellow potatoes, red bell peppers, delicata squash, garbanzo beans, etc.
But most days it’s just the usual onion, zucchini, sweet potato, and the 3-bean blend.
Please let me know in the comments how it tastes after your first meal or if you have any questions 🙂
Part 2:
Update: I haven’t gotten around to writing a more full Part 2, but here are my basic tips for adapting this for lunch/dinner instead (so that you can use this same basic formula for virtually every meal):
- Instead of egg, add meat or tempeh (I love the Trader Joe’s one).
- My key tip for meat is to get ground meat. Back before I became vegetarian, I would alternate between pork (my favorite), chicken, turkey, and beef. Ground meat cooks much faster, and disperses much better throughout this dish. By the way, if you’re American and used to meat being the main course, you might need less meat than you think. Personally, I found it helpful to think of the vegetables (or beans/lentils) as the main course instead (with a side of meat).
- Here’s how I recommend preparing the ground meat: When you get home from the grocery store, immediately separate out the meat package into smaller chunks. Each one can be like a small pancake. Then, wrap each one in wax paper, put them all in a freezer-safe container, and freeze them. That way, you can very easily remove just one meat “pancake” and throw that onto the pan next to the vegetables. As it starts to melt, break it up into tinier pieces and spread them out. Make sure it’s touching the oil so it browns nicely.
- Finally, to vary the dish for various dinners, you can use the same basic ingredients and method, but change the spices (or add sauces like soy sauce or tikka masala or miso paste at the end). Easiest of all is to get various premade spice mixes like “Mexican” or “Middle Eastern,” and that can make the meal taste quite different. You can also serve it on rice or noodles to make it heartier (again, to make it as easy as possible, I like the individual frozen rice packets at Trader Joe’s that you can just microwave).
- For even more variety, you can also use certain vegetables for brunch and other vegetables for dinner. For example, I tend to stick to sweet potato, zucchini, and onion for brunch, and for dinner I might add mushrooms, peppers, carrots, bok choy, rutabaga, etc.
Hope that helps!